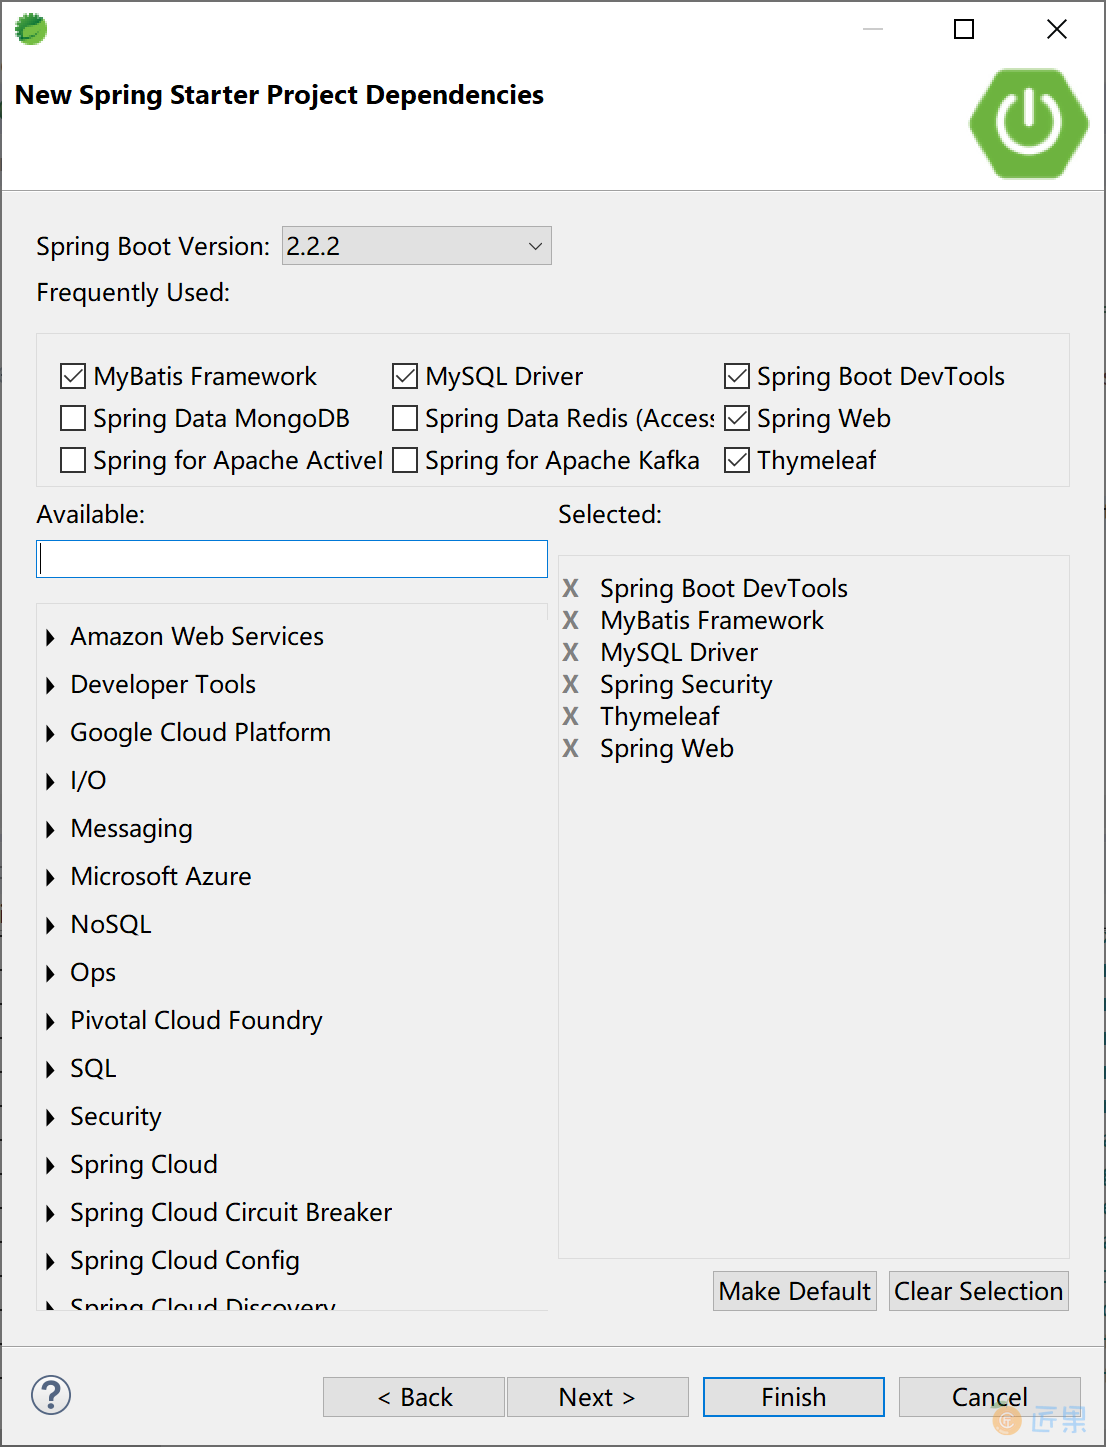
在 Spring Boot 中集成 Spring Security 一如既往地使用了启动器依赖,在创建 Spring Starter 项目时选中“Spring Security”依赖即可。

12.2.1 基本集成
添加“Spring Security”启动器依赖后,即完成了 Spring Security,项目的 pom 文件中的依赖为:
<dependency>
    <groupId>org.springframework.boot</groupId>
    <artifactId>spring-boot-starter-security</artifactId>
</dependency>
在项目中添加一个控制器 HelloController 类,测试 Spring Security 是否正确工作。
package com.example.security.controller;
import org.springframework.web.bind.annotation.RequestMapping;
import org.springframework.web.bind.annotation.RestController;
@RestController
@RequestMapping("/security/")
public class HelloController {
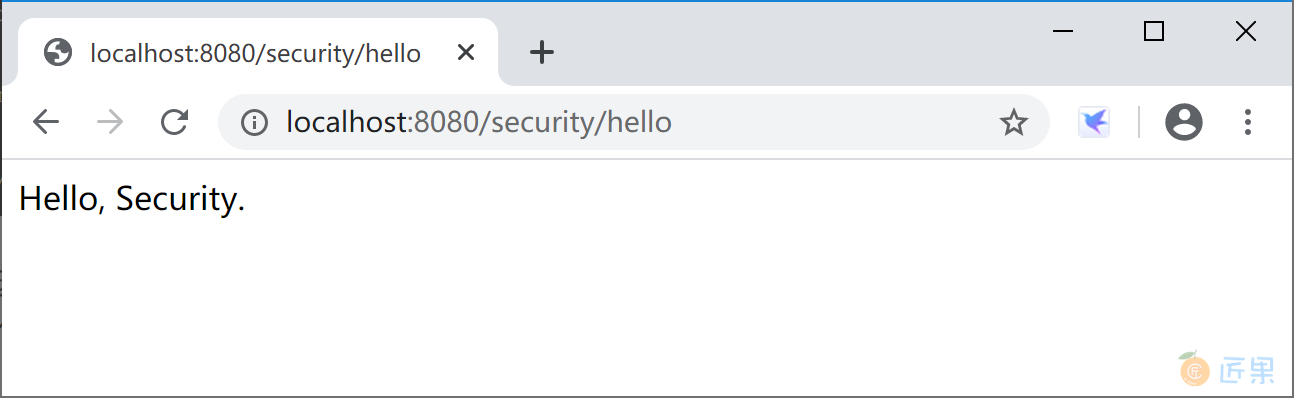
@RequestMapping("/hello")
public String hello() {
return "Hello, Security.";
}
}
运行应用后,打开浏览器,访问http://localhost:8080/security/hello,弹出Spring Security 提供的默认认证页面,用户名为 user,密码是在启动应用时生成的一个随机字符串(STS控制台中的密码信息:Using generated security password: 0585d7e0-dde1-4b9e-8352-27eb72517803)。

默认密码在应用启动时,打印在控制台中,当然每次启动时生成的密码都不一样。

使用 user 用户名和生成的密码(这里是“0585d7e0-dde1-4b9e-8352-27eb72517803”)登录后,可正确访问 HelloController 返回的信息。
通过查看 Spring Security 的源码org.springframework.boot.autoconfigure.security.servlet.UserDetailsServiceAutoConfiguration类,可以看到 inMemoryUserDetailsManager 方法中使用的SecurityProperties.User user属性提供了用户名和密码。由 getOrDeducePassword 方法通过日志logger.info(String.format("%n%nUsing generated security password: %s%n", user.getPassword()));将生成的默认密码打印到控制台。
public InMemoryUserDetailsManager inMemoryUserDetailsManager(SecurityProperties properties,
                                                             ObjectProvider<PasswordEncoder> passwordEncoder) {
    SecurityProperties.User user = properties.getUser();
    List<String> roles = user.getRoles();
    return new InMemoryUserDetailsManager(
        User.withUsername(user.getName()).password(getOrDeducePassword(user, passwordEncoder.getIfAvailable()))
        .roles(StringUtils.toStringArray(roles)).build());
}
进一步查看这个 User 类,可以看到默认登录用户为 user,密码为一个 uuid 字符串。
public static class User {
    /**
		 * Default user name.
		 */
    private String name = "user";
    /**
		 * Password for the default user name.
		 */
    private String password = UUID.randomUUID().toString();
    /**
		 * Granted roles for the default user name.
		 */
    private List<String> roles = new ArrayList<>();
    private boolean passwordGenerated = true;
    public String getName() {
        return this.name;
    }
    public void setName(String name) {
        this.name = name;
    }
    public String getPassword() {
        return this.password;
    }
    public void setPassword(String password) {
        if (!StringUtils.hasLength(password)) {
            return;
        }
        this.passwordGenerated = false;
        this.password = password;
    }
    public List<String> getRoles() {
        return this.roles;
    }
    public void setRoles(List<String> roles) {
        this.roles = new ArrayList<>(roles);
    }
    public boolean isPasswordGenerated() {
        return this.passwordGenerated;
    }
}
如果我们简单的在 application.properties 文件中指定用户名和密码:
spring.security.user.name=kevin
spring.security.user.password=6998
spring.security.user.roles=admin
则应用在启动时,就不会生成随机的 uuid 密码,也不会在控制台中打印Using generated security password: 0585d7e0-dde1-4b9e-8352-27eb72517803这样的信息了。
这个时候,通过浏览器访问http://localhost:8080/security/hello 则需要输入 kevin 用户和 6998 密码,就可以正常访问后台业务逻辑并返回正确的结果,并且该用户具有 admin 角色(虽然这个示例中角色没有任何用处)。
12.2.2 密码加密
除了在学习环境下,为了安全起见,密码存储都必须要加密 。
Spring Security 通过实现 PasswordEncoder 接口,提供了众多的密码加密类(包括供我们在学习环境下使用的 NoOpPasswordEncoder 明文密码编码器),供我们在实际工作中根据需要选用。
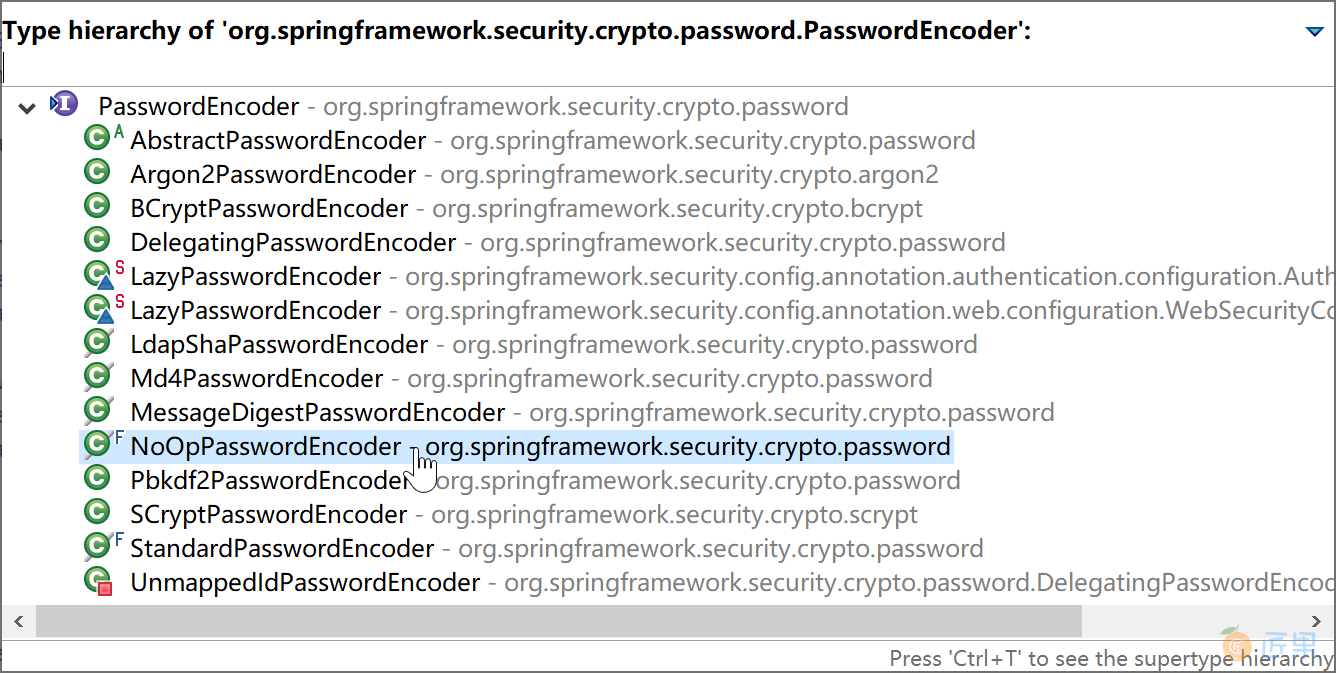
奇葩的 NoOpPasswordEncoder 类:encode(CharSequence rawPassword) 方法的返回值为encode(CharSequence rawPassword) ,也就是密码编码返回明文,所以千万不要在生产环境中使用。
修改 SecurityConfiguration 类,添加 BCryptPasswordEncoder 密码编码器。
BCryptPasswordEncoder,使用了 BCrypt 强哈希方法来加密密码。
package com.example.security.config;
import org.springframework.context.annotation.Bean;
import org.springframework.context.annotation.Configuration;
import org.springframework.security.config.annotation.authentication.builders.AuthenticationManagerBuilder;
import org.springframework.security.config.annotation.web.builders.HttpSecurity;
import org.springframework.security.config.annotation.web.configuration.EnableWebSecurity;
import org.springframework.security.config.annotation.web.configuration.WebSecurityConfigurerAdapter;
import org.springframework.security.crypto.bcrypt.BCryptPasswordEncoder;
import org.springframework.security.crypto.password.PasswordEncoder;
@Configuration
@EnableWebSecurity
public class SecurityConfiguration extends WebSecurityConfigurerAdapter {
	@Bean
	PasswordEncoder passwordEncoder() {
		PasswordEncoder encoder = new BCryptPasswordEncoder();
		return encoder;
	}
	@Override
	protected void configure(AuthenticationManagerBuilder auth) throws Exception {
		auth.inMemoryAuthentication()
		.withUser("admin").password(new BCryptPasswordEncoder().encode("admin")).roles("ADMIN", "USER")
		.and()
		.withUser("kevin").password(new BCryptPasswordEncoder().encode("6998")).roles("USER")
		.and()
		.withUser("roy").password(new BCryptPasswordEncoder().encode("3525")).roles("USER");
	}
	@Override
	protected void configure(HttpSecurity http) throws Exception {
		http.authorizeRequests()
		.antMatchers("/admin/**")
		.hasRole("ADMIN")
		.antMatchers("/user/**")
		.hasRole("USER")
		.anyRequest()
		.authenticated()
		.and()
		.formLogin()
		.loginProcessingUrl("/login")
		.permitAll();
	}
}
上面的示例中 PasswordEncoder 使用了 BCryptPasswordEncoder 实现类,并且在基于内存的认证器中给出用户密码时,使用了 BCryptPasswordEncoder 加密密码(password(new BCryptPasswordEncoder().encode("admin")))。这样,内存中存储的密码时通过 BCrypt 加密的密码,用户在登录页面输入密码(例如 admin 用户的密码 admin)后,Spring Security 使用 PasswordEncoder 对密码进行编码后与内存中存储的加密后的密码对比,完成认证,正确后就放行。
12.2.3 基于内存的认证
在本小节的学习过程中,通过将用户、密码和角色配置在内存中,会更方便集中精力学习 Spring Security。
注释掉上一小节 application.properties 文件中指定的用户名、密码和角色。
后续小节我们会通过数据库来完成一个RBAC的安全控制示例。
package com.example.security.config;
import org.springframework.context.annotation.Bean;
import org.springframework.context.annotation.Configuration;
import org.springframework.security.config.annotation.authentication.builders.AuthenticationManagerBuilder;
import org.springframework.security.config.annotation.web.builders.HttpSecurity;
import org.springframework.security.config.annotation.web.configuration.EnableWebSecurity;
import org.springframework.security.config.annotation.web.configuration.WebSecurityConfigurerAdapter;
import org.springframework.security.crypto.password.NoOpPasswordEncoder;
import org.springframework.security.crypto.password.PasswordEncoder;
@Configuration
@EnableWebSecurity
public class SecurityConfiguration extends WebSecurityConfigurerAdapter {
	@Bean
	PasswordEncoder passwordEncoder() {
		return NoOpPasswordEncoder.getInstance();
	}
	@Override
	protected void configure(AuthenticationManagerBuilder auth) throws Exception {
		auth.inMemoryAuthentication()
			.withUser("admin").password("admin").roles("ADMIN", "USER")
		.and()
			.withUser("kevin").password("6998").roles("USER")
		.and()
			.withUser("roy").password("3525").roles("USER");
	}
	@Override
	protected void configure(HttpSecurity http) throws Exception {
		http.authorizeRequests()
            .antMatchers("/admin/**")
            .hasRole("ADMIN")
            .antMatchers("/user/**")
            .hasRole("USER")
            .anyRequest()
            .authenticated()
		.and()
            .formLogin()
            .loginProcessingUrl("/login")
            .permitAll();
	}
}
上述代码,首先注册一个 PasswordEncoder(密码加密编码器类),这里为了测试简便,使用了不加密密码。在实际生产环境下绝对不能使用 这个密码编码器类。
然后使用 AuthenticationManagerBuilder.inMemoryAuthentication 的内存认证,通过编码添加了 3 个用户和对应的角色("ADMIN", "USER")。
最后使用 HttpSecurity 为不同的资源匹配了不同的角色访问权限。
添加 AdminController 控制器类,提供“/admin/hello”资源。
package com.example.security.controller;
import org.springframework.web.bind.annotation.RequestMapping;
import org.springframework.web.bind.annotation.RestController;
@RestController
@RequestMapping("/admin/")
public class AdminController {
	@RequestMapping("/hello")
	public String hello() {
		return "admin.hello";
	}
}
添加 UserController 控制器类,提供“/user/hello”资源。
package com.example.security.controller;
import org.springframework.web.bind.annotation.RequestMapping;
import org.springframework.web.bind.annotation.RestController;
@RestController
@RequestMapping("/user/")
public class UserController {
	@RequestMapping("/hello")
	public String hello() {
		return "user.hello";
	}
}
启动应用,测试:
- 使用 admin 用户登录,可以正确访问“/admin/hello”和“/user/hello”资源。
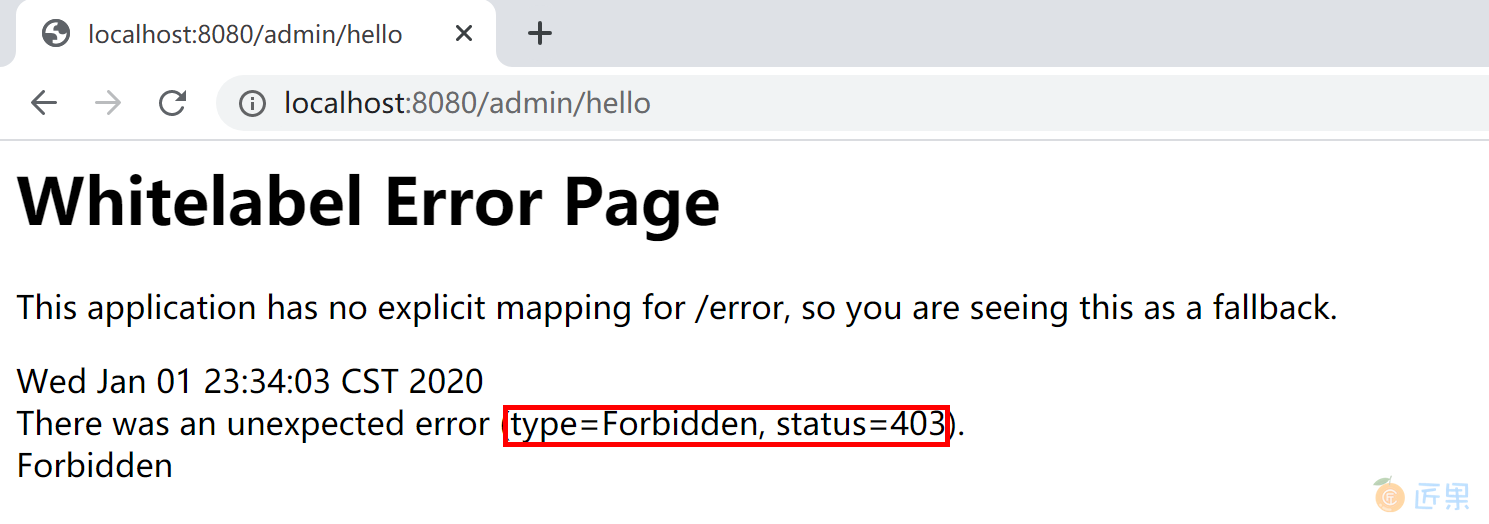
- 使用 kevin 用户登录,可以正确访问“/user/hello”资源,不能正确访问“/admin/hello”资源,错误信息如下:
以上就是一个基于内存认证的最简单的 RBAC(基于角色的存取控制)权限控制系统:
- kevin 拥有 USER 角色;
- “/user/**”资源授权给 USER 角色;
- kevin 登录后拥有 USER 角色,可以访问“/user/hello”资源。
12.2.4 登录表单/注销配置
虽然 Spring Security 提供了默认的登录表单,但是在实际工作中绝大多数情况都用不上。基本上在所有的项目/产品中,都会使用自定义的登录表单。当然,注销登录(或者叫做登出),也会使用自定义的配置。
通过查看 Spring Security 源码,可以看到默认登录表单在org.springframework.security.web.authentication.ui.DefaultLoginPageGeneratingFilter.generateLoginPageHtml方法中构建。
在 DefaultLoginPageGeneratingFilter 类的 doFilter 方法中response.getWriter().write(loginPageHtml)代码向浏览器输出登录表单。
public void doFilter(ServletRequest req, ServletResponse res, FilterChain chain)
    throws IOException, ServletException {
    HttpServletRequest request = (HttpServletRequest) req;
    HttpServletResponse response = (HttpServletResponse) res;
    boolean loginError = isErrorPage(request);
    boolean logoutSuccess = isLogoutSuccess(request);
    if (isLoginUrlRequest(request) || loginError || logoutSuccess) {
        String loginPageHtml = generateLoginPageHtml(request, loginError,
                                                     logoutSuccess);
        response.setContentType("text/html;charset=UTF-8");
        response.setContentLength(loginPageHtml.getBytes(StandardCharsets.UTF_8).length);
        response.getWriter().write(loginPageHtml);
        return;
    }
    chain.doFilter(request, response);
}
本小节,我们使用 Thymeleaf 模板+基于内存认证方式来学习如何自定义登录表单。
首先,我们添加几个简单的页面,然后通过 Spring Security 基于内存的配置设置其用户、角色、自定义登录表单、注销等操作。
12.2.4.1 首页
创建src/main/resources/templates/index.html页面,作为项目的首页。
<!DOCTYPE html>
<html xmlns:th="http://www.thymeleaf.org">
<head>
<title>示例首页</title>
</head>
<body>
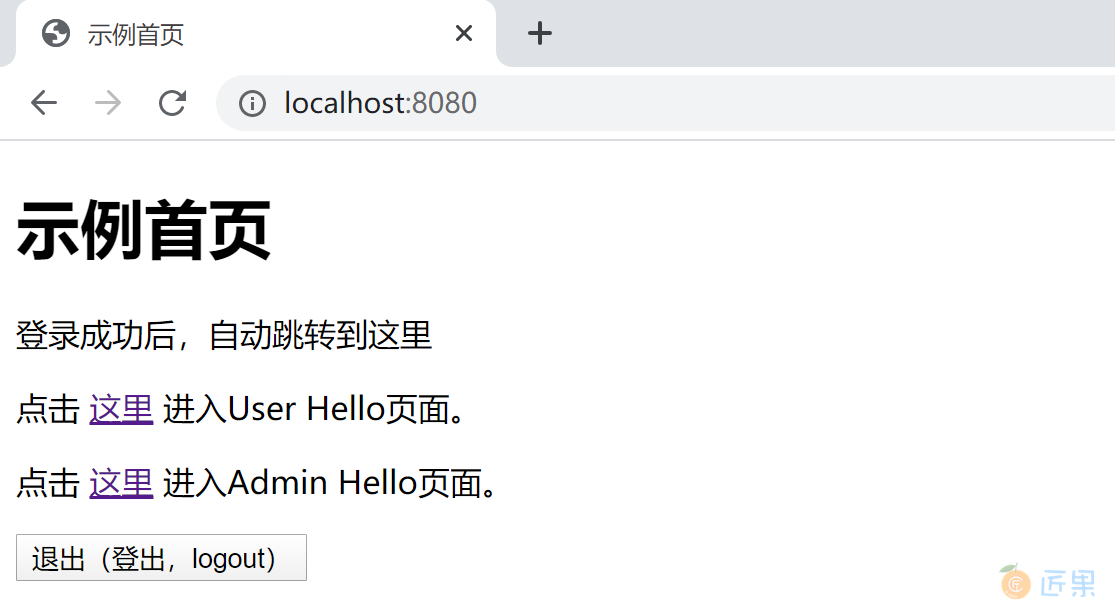
<h1>示例首页</h1>
<p>登录成功后,自动跳转到这里</p>
<p>
点击 <a th:href="@{/user/hello}">这里</a> 进入User Hello页面。
</p>
<p>
点击 <a th:href="@{/admin/hello}">这里</a> 进入Admin Hello页面。
</p>
<form th:action="@{/logout}" method="post">
<input type="submit" value="退出(登出,logout)" />
</form>
</body>
</html>
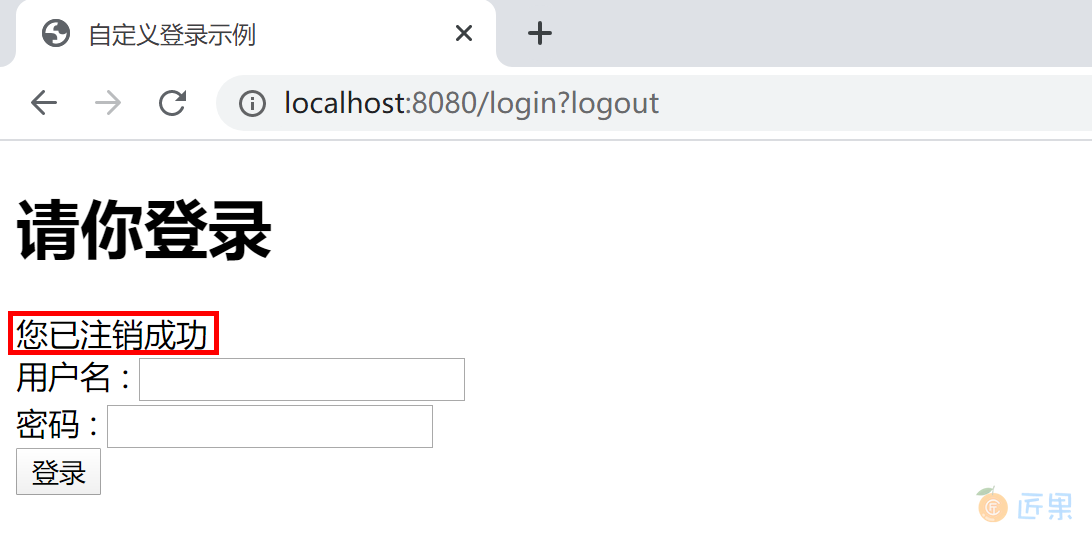
12.2.4.2 登录页面
创建src/main/resources/templates/login.html页面,作为项目的登录页面。
<!DOCTYPE html>
<html xmlns:th="http://www.thymeleaf.org">
<head>
<title>自定义登录示例</title>
</head>
<body>
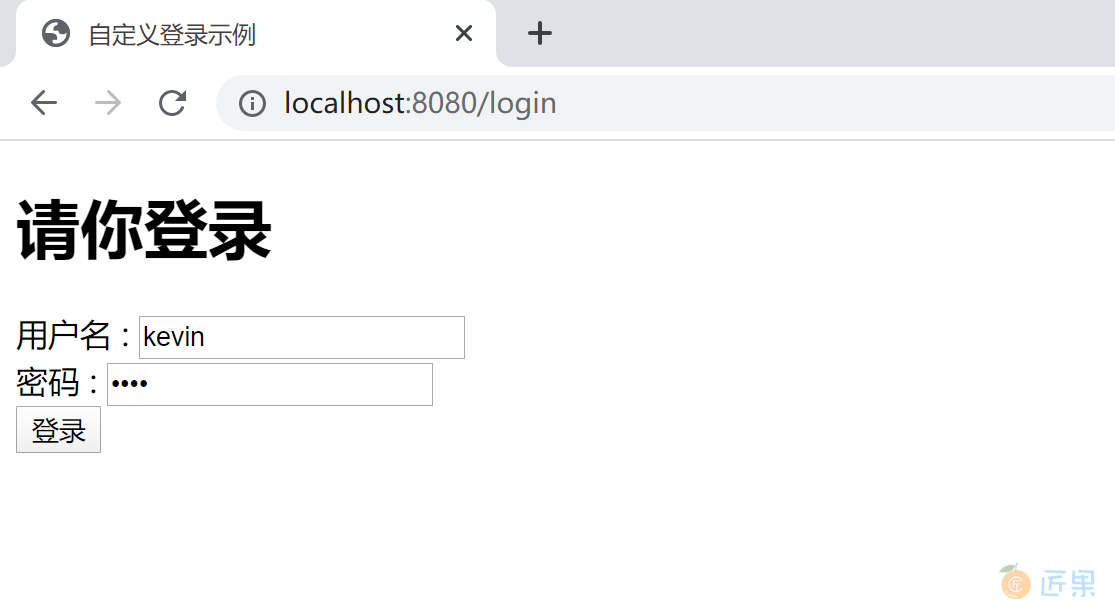
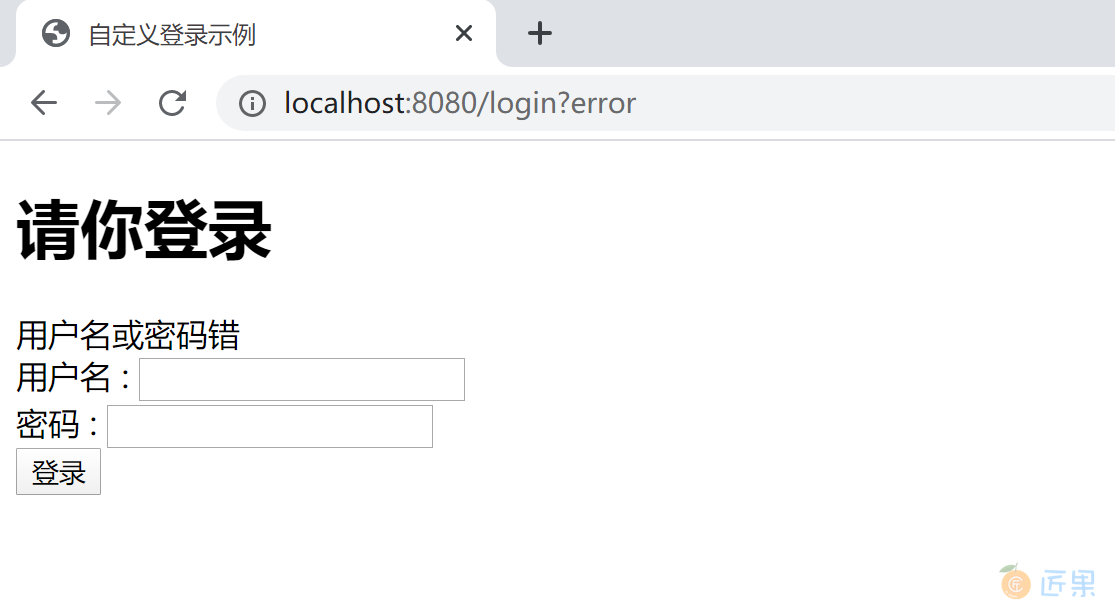
<h1>请你登录</h1>
<div th:if="${param.error}">用户名或密码错</div>
<div th:if="${param.logout}">您已注销成功</div>
<form th:action="@{/login}" method="post">
<div>
<label> 用户名 : <input type="text" name="login_username" />
</label>
</div>
<div>
<label> 密码 : <input type="password" name="login_password" />
</label>
</div>
<div>
<input type="submit" value="登录" />
</div>
</form>
</body>
</html>
在登录页面中,特意将用户名 input 设为 login_username,演示匹配后续的自定义登录页面配置信息。
12.2.4.3 管理页面
创建src/main/resources/templates/admin/hello.html,作为项目的管理页面,按照本示例设置,需要 ADMIN 角色的用户才可以访问。
<!DOCTYPE html>
<html xmlns:th="http://www.thymeleaf.org">
<head>
<title>Admin.Hello Page</title>
</head>
<body>
	<h1>Admin Page</h1>
	<p th:text="${user}"/>
	<p><a th:href="@{/index}">返回</a></p>
</body>
</html>
12.2.4.4 用户页面
创建src/main/resources/templates/user/hello.html,作为项目的用户页面,按照本示例设置,需要 USER 角色的用户才可以访问。
<!DOCTYPE html>
<html xmlns:th="http://www.thymeleaf.org">
<head>
<title>User.Hello Page</title>
</head>
<body>
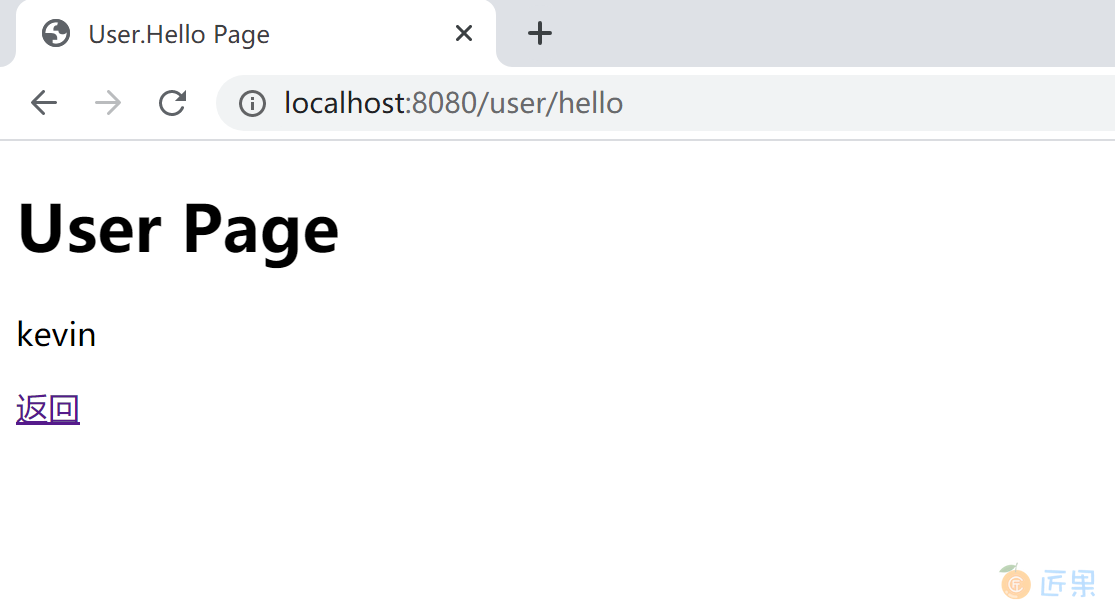
<h1>User Page</h1>
<p><p th:text="${user}"/></p>
<p><a th:href="@{/index}">返回</a></p>
</body>
</html>
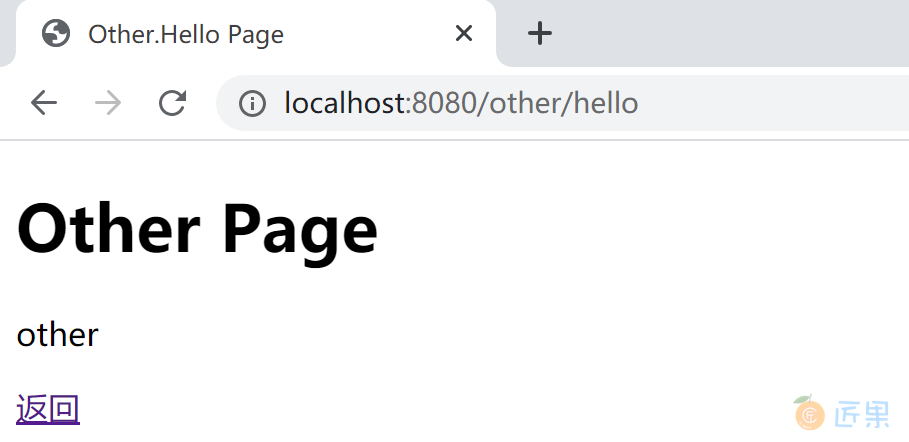
12.2.4.5 其他页面
创建src/main/resources/templates/other/hello.html,作为项目的其他页面,按照本示例设置,任何登录用户(任何角色)都可以访问。
<!DOCTYPE html>
<html xmlns:th="http://www.thymeleaf.org">
<head>
<title>Other.Hello Page</title>
</head>
<body>
	<h1>Other Page</h1>
	<p><p th:text="${user}"/></p>
	<p><a th:href="@{/index}">返回</a></p>
</body>
</html>
12.2.4.6 页面 Controller
新建一个控制页面跳转的 PageController,将上述4个页面串接起来。
package com.example.security.controller;
import org.springframework.stereotype.Controller;
import org.springframework.web.bind.annotation.RequestMapping;
import org.springframework.web.bind.annotation.RequestMethod;
import org.springframework.web.servlet.ModelAndView;
@Controller
public class PagesController {
	@RequestMapping("/index")
	public String index() {
		return "/index";
	}
	@RequestMapping(value = "/login", method = RequestMethod.GET)
	public String login() {
		return "/login";
	}
	@RequestMapping("/admin/hello")
	public ModelAndView adminHello() {
		ModelAndView mv = new ModelAndView();
		mv.addObject("user", "admin");
		mv.setViewName("/admin/hello");
		return mv;
	}
	@RequestMapping("/user/hello")
	public ModelAndView userHello() {
		ModelAndView mv = new ModelAndView();
		mv.addObject("user", "kevin");
		mv.setViewName("/user/hello");
		return mv;
	}
	@RequestMapping("/other/hello")
	public ModelAndView otherHello() {
		ModelAndView mv = new ModelAndView();
		mv.addObject("user", "other");
		mv.setViewName("/other/hello");
		return mv;
	}
}
12.2.4.7 Spring Security 配置
在启用了 Spring Security 的 Spring Boot 应用中,我们可以通过自定义表单 HTML 页面,然后通过 HttpSecurity 的 formLogin 和 logout 自定义登录页面和注销(登出)操作和行为。
package com.example.security.config;
import org.springframework.context.annotation.Configuration;
import org.springframework.security.config.annotation.authentication.builders.AuthenticationManagerBuilder;
import org.springframework.security.config.annotation.web.builders.HttpSecurity;
import org.springframework.security.config.annotation.web.builders.WebSecurity;
import org.springframework.security.config.annotation.web.configuration.EnableWebSecurity;
import org.springframework.security.config.annotation.web.configuration.WebSecurityConfigurerAdapter;
import org.springframework.security.crypto.bcrypt.BCryptPasswordEncoder;
@Configuration
@EnableWebSecurity
public class SecurityConfiguration extends WebSecurityConfigurerAdapter {
	@Override
	protected void configure(AuthenticationManagerBuilder auth) throws Exception {
		auth.inMemoryAuthentication()
		.passwordEncoder(new BCryptPasswordEncoder())
		.withUser("admin").password(new BCryptPasswordEncoder().encode("admin")).roles("ADMIN", "USER")
		.and()
		.withUser("kevin").password(new BCryptPasswordEncoder().encode("6998")).roles("USER")
		.and()
		.withUser("roy").password(new BCryptPasswordEncoder().encode("3525")).roles("OTHER");
	}
	@Override
	protected void configure(HttpSecurity http) throws Exception {
		http.formLogin()
			.loginPage("/login")
			.usernameParameter("login_username")
			.passwordParameter("login_password")
			.failureUrl("/login?error")
			.defaultSuccessUrl("/index")
			.permitAll()
		.and().logout()
			.logoutUrl("/logout")
			.logoutSuccessUrl("/login?logout")
			.clearAuthentication(true)
			.invalidateHttpSession(true)
			.permitAll()
		.and().authorizeRequests()
			.antMatchers("/admin/**").hasRole("ADMIN")
			.antMatchers("/user/**").hasRole("USER")
			.anyRequest()
			.authenticated();
	}
	@Override
    public void configure(WebSecurity web) {
		web.ignoring().antMatchers("/config/**", "/css/**", "/images/**", "/js/**");
    }
}
formLogin().permitAll()代码指示 Spring Security 允许任何用户访问 formLogin 与之关联的 URL(/login);logout().permitAll()代码指示 Spring Security 允许任何用户访问 logout 与之关联的 URL(/logout);authorizeRequests().anyRequest().authenticated()代码指示 Spring Security 允许登录(通过认证的)用户访问所有的页面(比如“other/hello.html”页面);antMatchers("/admin/**").hasRole("ADMIN")具有 ADMIN 角色的登录用户才都访问 /admin/ 开头的页面。
12.2.4.8 测试
启动应用程序,打开浏览器,输出http://localhost:8080/ 地址,自动跳转到登录页面。
输入错误的用户名,会跳转回登录页面,并且显示错误信息:用户名或密码错。
输入正确的用户名和密码,登录后会跳转到首页。
点击 User Hello 页面的链接,可以正确访问 User Hello 页面。
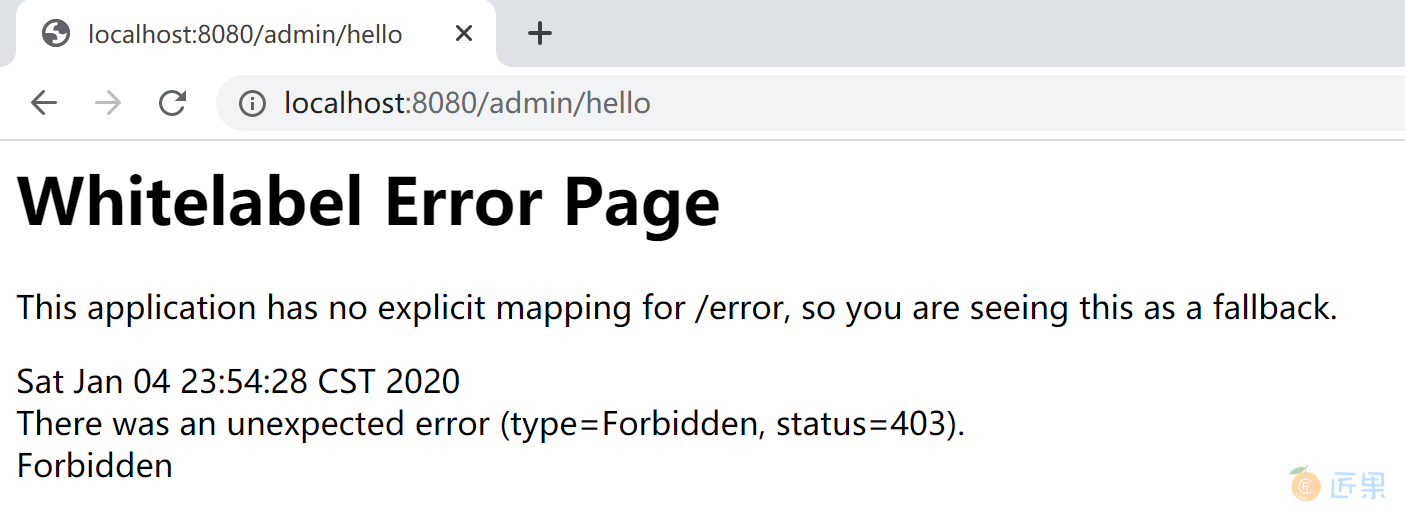
返回首页,后点击 Admin Hello 页面的链接,由于 Kevin 用户不具有 ADMIN 角色,所以不可以访问 Admin Hello 页面。
使用 roy 用户登录(其用户角色为 OTHER),既不能访问 admin/hello 页面,也不能访问 user/hello 页面,只能访问 other/hello 页面。当然,admin 和 kevin 用户登录,都可以访问 other/hello 页面。
在首页,点击退出(登出,logout)按钮,可以正确注销当前登录。
以上测试,符合项目权限控制预期。
12.2.5 基于数据库的认证
在我们实际的工作中,几乎所有的认证授权,都是基于数据库中存储的用户授权数据来的完成的。
在Spring Security中,通过org.springframework.security.core.userdetails.UserDetailsl和org.springframework.security.core.userdetails.UserDetailsService两个接口完成程序定义(在这两个接口的实现类中访问数据库中的数据)的用户服务,然后通过AuthenticationManagerBuilder.userDetailsService(customUserService())将我们通过数据库存储的用户角色(授权)连接到 Spring Security,完成用户认证与授权(Authentication 和 Authorization)。
@Bean
UserDetailsService customUserService() { // 注册UserDetailsService 的bean
    return new CustomUserDetailsService();
}
@Bean
PasswordEncoder passwordEncoder() {
    PasswordEncoder encoder = new BCryptPasswordEncoder();
    return encoder;
}
@Override
public void configure(AuthenticationManagerBuilder auth) throws Exception {
    auth.userDetailsService(customUserService()).passwordEncoder(passwordEncoder());
}
本小节,我们使用 MySQL 数据库,通过 MyBatis 来学习如何基于数据库来支持 Spring Security 的用户认证。
创建项目,添加数据库及 Spring Security 相关的启动器依赖。
项目的 pom 依赖为:
<dependency>
    <groupId>org.springframework.boot</groupId>
    <artifactId>spring-boot-starter-security</artifactId>
</dependency>
<dependency>
    <groupId>org.springframework.boot</groupId>
    <artifactId>spring-boot-starter-thymeleaf</artifactId>
</dependency>
<dependency>
    <groupId>org.springframework.boot</groupId>
    <artifactId>spring-boot-starter-web</artifactId>
</dependency>
<dependency>
    <groupId>org.mybatis.spring.boot</groupId>
    <artifactId>mybatis-spring-boot-starter</artifactId>
    <version>2.1.1</version>
</dependency>
<dependency>
    <groupId>org.springframework.boot</groupId>
    <artifactId>spring-boot-devtools</artifactId>
    <scope>runtime</scope>
    <optional>true</optional>
</dependency>
<dependency>
    <groupId>mysql</groupId>
    <artifactId>mysql-connector-java</artifactId>
    <scope>runtime</scope>
</dependency>
项目的 application.yml 文件中配置数据库连接及 MyBatis 属性。
# mysql数据源配置
spring:
  datasource:
    url: jdbc:mysql://localhost:3306/ssdemo?useUnicode=true&characterEncoding=utf-8&serverTimezone=GMT%2B8
    username: root
    password: 123456
    driver-class-name: com.mysql.cj.jdbc.Driver
# mybatis 配置信息
mybatis:
  mapper-locations: classpath:mapping/*Mapper.xml
  type-aliases-package: com.example.security.db.entity
  configuration:
    map-underscore-to-camel-case: true
mybatis.configuration.map-underscore-to-camel-case=true是打开字段下划线和 Java 实体类中属性“驼峰命名”之间的映射。例如 role_code 字段自动映射为 roleCode,反之亦然。
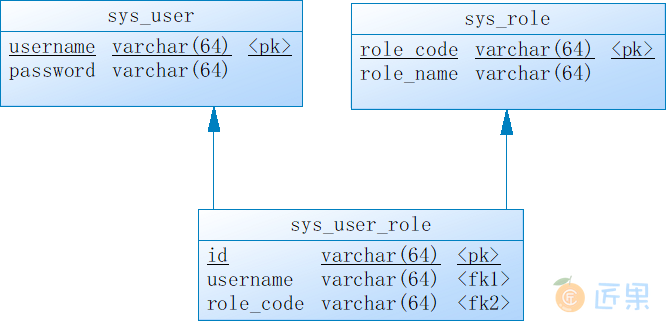
12.2.5.1 创建数据库表
基于最简学习案例原则,设计的数据库表(用户、角色和用户角色关联表)只包含最少的字段。
drop table if exists sys_role;
drop table if exists sys_user;
drop table if exists sys_user_role;
/*==============================================================*/
/* Table: sys_role                                              */
/*==============================================================*/
create table sys_role
(
   role_code            varchar(64) not null,
   role_name            varchar(64),
   primary key (role_code)
);
/*==============================================================*/
/* Table: sys_user                                              */
/*==============================================================*/
create table sys_user
(
   username             varchar(64) not null,
   password             varchar(64),
   primary key (username)
);
/*==============================================================*/
/* Table: sys_user_role                                         */
/*==============================================================*/
create table sys_user_role
(
   id                   varchar(64) not null,
   username             varchar(64),
   role_code            varchar(64),
   primary key (id)
);
alter table sys_user_role add constraint FK_Reference_1 foreign key (username)
      references sys_user (username) on delete restrict on update restrict;
alter table sys_user_role add constraint FK_Reference_2 foreign key (role_code)
      references sys_role (role_code) on delete restrict on update restrict;
在 3 张表中插入一些测试数据。
INSERT INTO `sys_user` VALUES ('admin', 'admin');
INSERT INTO `sys_user` VALUES ('kevin', '6998');
INSERT INTO `sys_user` VALUES ('roy', '3525');
INSERT INTO `sys_role` VALUES ('ROLE_ADMIN', '管理角色');
INSERT INTO `sys_role` VALUES ('ROLE_OTHER', '其他角色');
INSERT INTO `sys_role` VALUES ('ROLE_USER', '用户角色');
INSERT INTO `sys_user_role` VALUES ('1', 'admin', 'ROLE_ADMIN');
INSERT INTO `sys_user_role` VALUES ('2', 'admin', 'ROLE_USER');
INSERT INTO `sys_user_role` VALUES ('3', 'kevin', 'ROLE_USER');
INSERT INTO `sys_user_role` VALUES ('4', 'roy', 'ROLE_OTHER');
12.2.5.2 创建实体类
根据数据库设计,创建 3 个实体类,供后续 MyBatis 输出据库操作用。创建 SysUser 实体类(对应 sys_user 表)。
package com.example.security.db.entity;
public class SysUser {
	private String username;
	private String password;
	public String getUsername() {
		return username;
	}
	public void setUsername(String username) {
		this.username = username;
	}
	public String getPassword() {
		return password;
	}
	public void setPassword(String password) {
		this.password = password;
	}
}
创建 SysRole 实体类(对应 sys_role 表)。
package com.example.security.db.entity;
public class SysRole {
	private String roleCode;
	private String roleName;
	public String getRoleCode() {
		return roleCode;
	}
	public void setRoleCode(String roleCode) {
		this.roleCode = roleCode;
	}
	public String getRoleName() {
		return roleName;
	}
	public void setRoleName(String roleName) {
		this.roleName = roleName;
	}
}
创建 SysUserRole 实体类(对应 sys_user_role 表)。
package com.example.security.db.entity;
public class SysUserRole {
	private String id;
	private String username;
	private String roleCode;
	public String getId() {
		return id;
	}
	public void setId(String id) {
		this.id = id;
	}
	public String getUsername() {
		return username;
	}
	public void setUsername(String username) {
		this.username = username;
	}
	public String getRoleCode() {
		return roleCode;
	}
	public void setRoleCode(String roleCode) {
		this.roleCode = roleCode;
	}
}
12.2.5.3 创建 DAO
最简起见,我们创建 SysUser 和 SysUserRole 对应的 DAO(mapper)。
SysUser 的 mapper.xml:
<?xml version="1.0" encoding="UTF-8"?>
<!DOCTYPE mapper PUBLIC "-//mybatis.org//DTD Mapper 3.0//EN" "http://mybatis.org/dtd/mybatis-3-mapper.dtd">
<mapper namespace="com.example.security.db.mapper.SysUserMapper">
    <select id="selectSysUser" resultType="SysUser">
        select * from sys_user where username = #{username}
    </select>

</mapper>
SysUser 的 Mapper:
package com.example.security.db.mapper;
import org.springframework.stereotype.Repository;
import com.example.security.db.entity.SysUser;
@Repository
public interface SysUserMapper {
	SysUser selectSysUser(String username);
}
SysUserRole 的 mapper.xml:
<?xml version="1.0" encoding="UTF-8"?>
<!DOCTYPE mapper PUBLIC "-//mybatis.org//DTD Mapper 3.0//EN" "http://mybatis.org/dtd/mybatis-3-mapper.dtd">
<mapper namespace="com.example.security.db.mapper.SysUserRoleMapper">
    <select id="selectSysUserRole" resultType="SysUserRole">
        select * from sys_user_role where username = #{username}
    </select>

</mapper>
SysUserRole 的 Mapper:
package com.example.security.db.mapper;
import java.util.List;
import org.springframework.stereotype.Repository;
import com.example.security.db.entity.SysUserRole;
@Repository
public interface SysUserRoleMapper {
	List<SysUserRole> selectSysUserRole(String username);
}
以上两个 mapper,完成用户的用户角色关系这两张表的访问。
12.2.5.4 创建 CustomUserService
CustomUserService 实现org.springframework.security.core.userdetails.UserDetailsService接口,完成用户及用户所拥有的角色信息从数据库中获取的功能。
创建 CustomUserService 类:
package com.example.security.db.service;
import java.util.ArrayList;
import java.util.List;
import org.springframework.beans.factory.annotation.Autowired;
import org.springframework.security.core.authority.SimpleGrantedAuthority;
import org.springframework.security.core.userdetails.User;
import org.springframework.security.core.userdetails.UserDetails;
import org.springframework.security.core.userdetails.UserDetailsService;
import org.springframework.security.core.userdetails.UsernameNotFoundException;
import com.example.security.db.entity.SysUser;
import com.example.security.db.entity.SysUserRole;
import com.example.security.db.mapper.SysUserMapper;
import com.example.security.db.mapper.SysUserRoleMapper;
public class CustomUserService implements UserDetailsService {
	@Autowired
	SysUserMapper sysUserMapper;
	@Autowired
	SysUserRoleMapper sysUserRoleMapper;
	@Override
	public UserDetails loadUserByUsername(String username) throws UsernameNotFoundException {
		SysUser sysUser = sysUserMapper.selectSysUser(username);
		String password = sysUser.getPassword();
		List<SysUserRole> sysUserRoles = sysUserRoleMapper.selectSysUserRole(username);
		List<SimpleGrantedAuthority> authorities = new ArrayList<>();
		for (SysUserRole sysUserRole : sysUserRoles) {
			authorities.add(new SimpleGrantedAuthority(sysUserRole.getRoleCode()));
		}
		return new User(username, password, authorities);
	}
}
12.2.5.5 创建 Controller
按照上一小节创建页面访问的控制器 PagesController:
package com.example.security.db.controller;
import org.springframework.stereotype.Controller;
import org.springframework.web.bind.annotation.RequestMapping;
import org.springframework.web.bind.annotation.RequestMethod;
import org.springframework.web.servlet.ModelAndView;
@Controller
public class PagesController {
	@RequestMapping("/index")
	public String index() {
		return "/index";
	}
	@RequestMapping(value = "/login", method = RequestMethod.GET)
	public String login() {
		return "/login";
	}
	@RequestMapping("/admin/hello")
	public ModelAndView adminHello() {
		ModelAndView mv = new ModelAndView();
		mv.addObject("user", "admin");
		mv.setViewName("/admin/hello");
		return mv;
	}
	@RequestMapping("/user/hello")
	public ModelAndView userHello() {
		ModelAndView mv = new ModelAndView();
		mv.addObject("user", "kevin");
		mv.setViewName("/user/hello");
		return mv;
	}
	@RequestMapping("/other/hello")
	public ModelAndView otherHello() {
		ModelAndView mv = new ModelAndView();
		mv.addObject("user", "other");
		mv.setViewName("/other/hello");
		return mv;
	}
}
12.2.5.6 Thymeleaf 页面
复用上一小节(12.2.4)中的 Thymeleaf 页面。
12.2.5.7 Spring Security 配置
创建配置类 SecurityConfiguration,其中关键的一句代码(将数据库访问用户信息的 CustomUserService 类注入)是auth.userDetailsService(customUserService());
package com.example.security.db.config;
import org.springframework.context.annotation.Bean;
import org.springframework.context.annotation.Configuration;
import org.springframework.security.config.annotation.authentication.builders.AuthenticationManagerBuilder;
import org.springframework.security.config.annotation.web.builders.HttpSecurity;
import org.springframework.security.config.annotation.web.builders.WebSecurity;
import org.springframework.security.config.annotation.web.configuration.EnableWebSecurity;
import org.springframework.security.config.annotation.web.configuration.WebSecurityConfigurerAdapter;
import org.springframework.security.core.userdetails.UserDetailsService;
import org.springframework.security.crypto.bcrypt.BCryptPasswordEncoder;
import org.springframework.security.crypto.password.NoOpPasswordEncoder;
import org.springframework.security.crypto.password.PasswordEncoder;
import com.example.security.db.service.CustomUserService;
@Configuration
@EnableWebSecurity
public class SecurityConfiguration extends WebSecurityConfigurerAdapter {
	@Bean
	PasswordEncoder passwordEncoder() {
		return NoOpPasswordEncoder.getInstance();
	}
	@Bean
    UserDetailsService customUserService(){
        return new CustomUserService();
    }
	@Override
	protected void configure(AuthenticationManagerBuilder auth) throws Exception {
		auth.userDetailsService(customUserService());
	}
	@Override
	protected void configure(HttpSecurity http) throws Exception {
		http.formLogin()
			.loginPage("/login")
			.usernameParameter("login_username")
			.passwordParameter("login_password")
			.failureUrl("/login?error")
			.defaultSuccessUrl("/index")
			.permitAll()
		.and().logout()
			.logoutUrl("/logout")
			.logoutSuccessUrl("/login?logout")
			.clearAuthentication(true)
			.invalidateHttpSession(true)
			.permitAll()
		.and().authorizeRequests()
			.antMatchers("/admin/**").hasRole("ADMIN")
			.antMatchers("/user/**").hasRole("USER")
			.anyRequest()
			.authenticated();
	}
	@Override
    public void configure(WebSecurity web) {
		web.ignoring().antMatchers("/config/**", "/css/**", "/images/**", "/js/**");
    }
}
在学习过程中为了方便往数据库中录入用户密码信息(明文),所以上面的配置中使用了 NoOpPasswordEncoder 这个奇葩的密码编码器,一如既往地强调:严禁在非学习系统中使用这个(明文的)密码编码器。
Spring Security 配置中使用角色默认前缀为“ROLE_”,例如使用角色“ADMIN”,在数据库表中应该存储为“ROLE_ADMIN”。参考
org.springframework.security.access.vote.RoleVoter类中的rolePrefix属性。
12.2.5.8 启动类
启动类中别忘了 MyBatis 的 @MapperScan 注解。
package com.example.security.db;
import org.mybatis.spring.annotation.MapperScan;
import org.springframework.boot.SpringApplication;
import org.springframework.boot.autoconfigure.SpringBootApplication;
@SpringBootApplication
@MapperScan("com.example.security.db.mapper")
public class SpringBootSecurityDbApplication {
	public static void main(String[] args) {
		SpringApplication.run(SpringBootSecurityDbApplication.class, args);
	}
}
12.2.5.9 测试
启动项目测试,和上一小节(12.2.4)效果一致。
下一节:OAuth (Open Authorization,开放授权)是一个关于授权的开放网络标准,它为用户资源的授权定义了一个安全、开放及简单的标准,允许用户让第三方应用访问该用户在某一网站上存储的私密的资源(如照片,视频,联系人列表),而不需要将用户名和密码提供给第三方应用。
OAuth 允许用户提供一个令牌,而不是用户名和密码来访问他们存放在特定服务提供者的数据。每一个令牌授权一个特定的网站在特定的时段内访问特定的资源。这样,OAuth 让用户可以授权第三方网站访问他们存储在另外服务提供者的某些特定信息,而非所有内容。