在学习完 Spring Boot 后,往前一步,我们一起走入 Spring Cloud 的世界。
用脚丈量过的地方,才不叫远方。
用手指敲过的代码,才能叫学过。
这是一份 Spring Cloud 的入门实验指南,使用了 Spring Boot 2.3.4.RELEASE 和 Spring Cloud Hoxton.SR8,其主要涉及到的分布式微服务组件有:
- 服务注册中心:Eureka;
- 负载均衡声明式调用:Feign;
- 熔断器(在 Feign 中使用):Hystrix;
- 网关:Zuul;
- 配置中心:Config;
- 缓存:Redis;
- 消息:RabbitMQ;
本指南剥离了业务场景,可做为最初始的 Spring Cloud 入门指导手册。
目的是从零开始搭建一个最基础的微服务脚手架。
1. 环境准备
1.1 安装 RabbitMQ
到官网下载最新的 RabbitMQ 3.8.9,对应的 Erlang 推荐使用 23.1 https://erlang.org/download/otp_win64_23.1.exe,然后安装。安装测试文档,请参考 9.4 Spring Boot 集成 RabbitMQ ,请注意其中的版本变化。
启动安装程序:
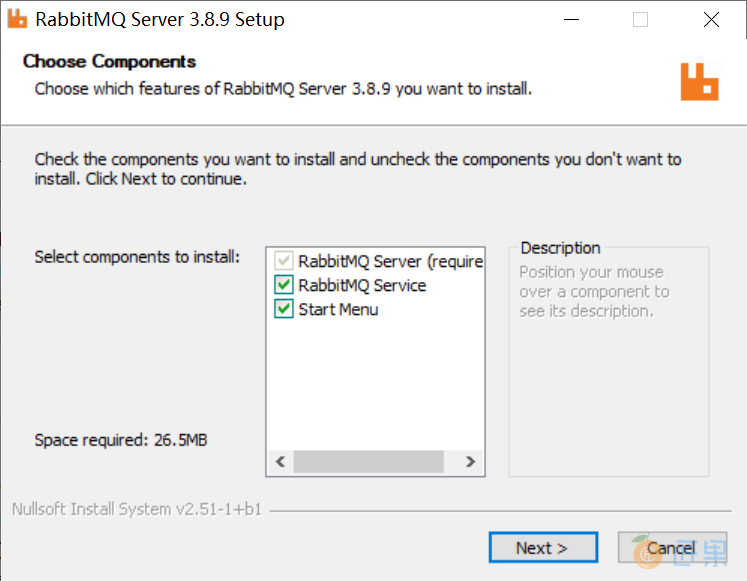
选择安装目录:
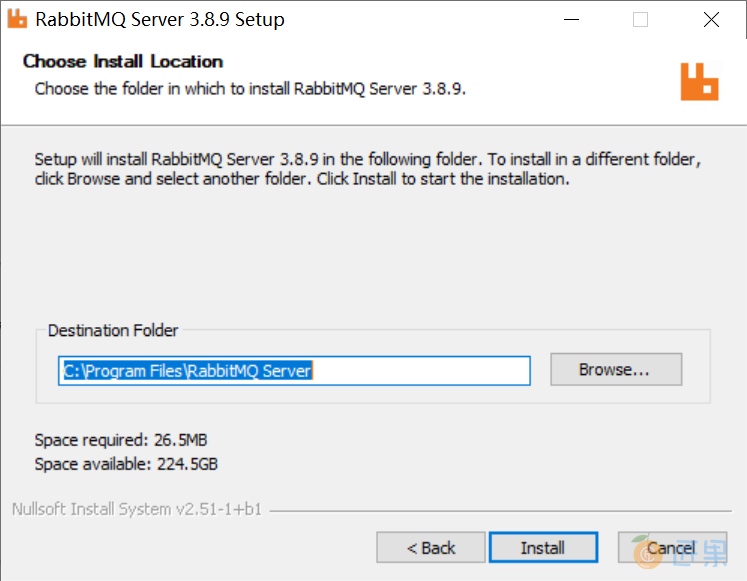
打开命令提示符窗口,进入C:\Program Files\RabbitMQ Server\rabbitmq_server-3.8.9\sbin目录,执行rabbitmq-plugins.bat enable rabbitmq_management 开启Web管理插件。

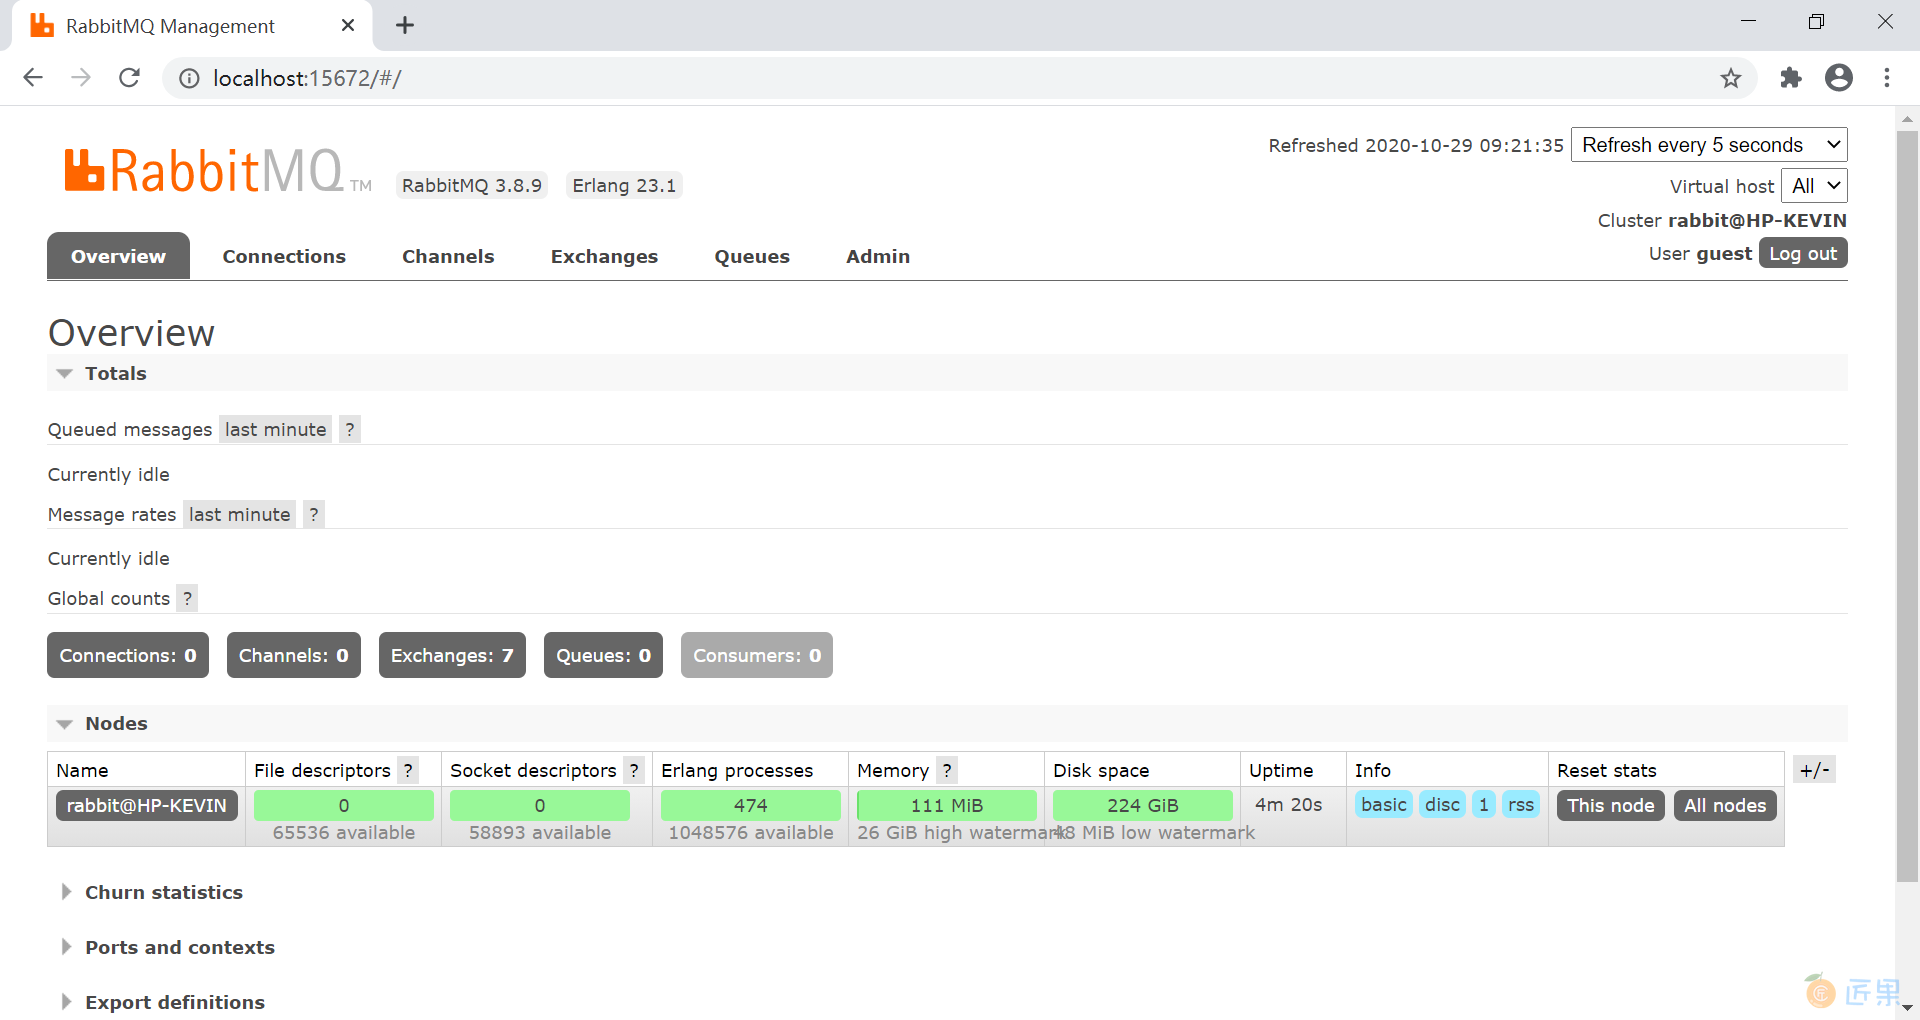
打开浏览器访问http://localhost:15672/,使用guest用户,密码guest登录管理控制台,验证安装。
1.2 安装 Redis
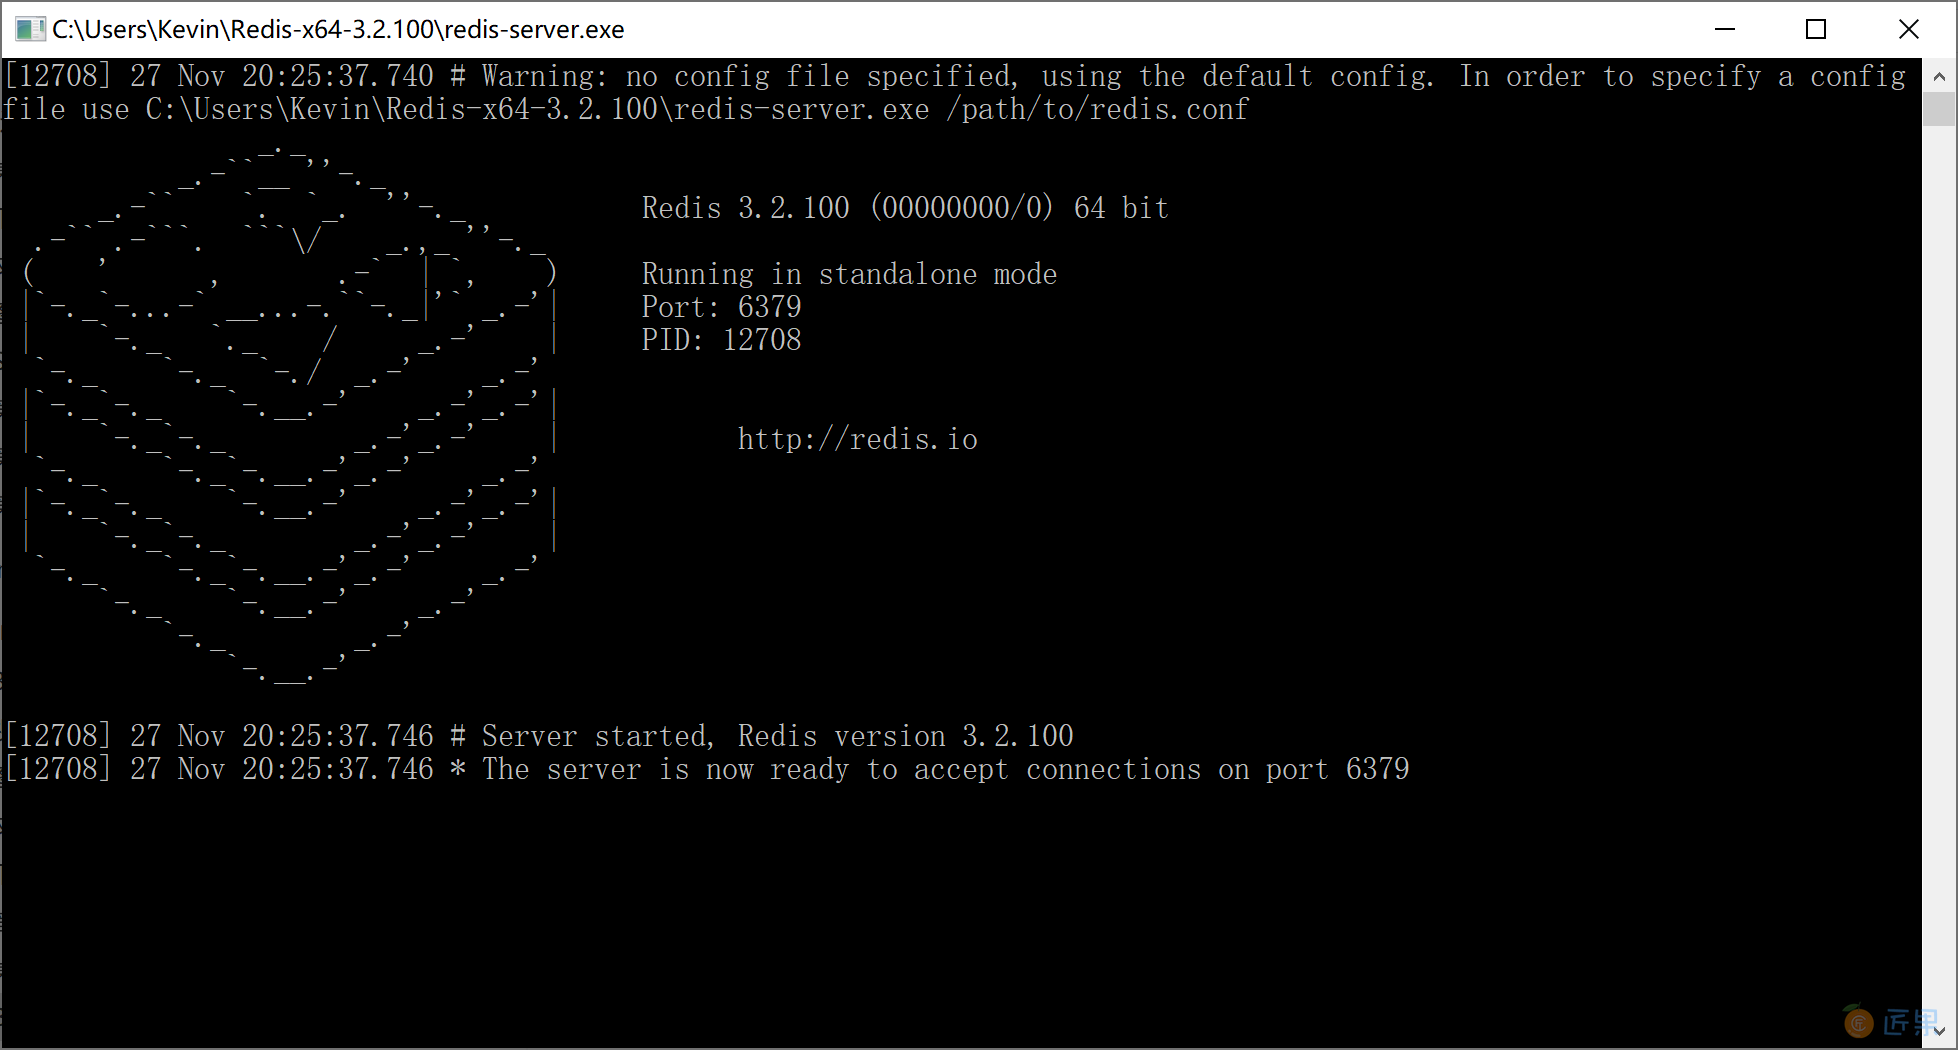
在https://github.com/microsoftarchive/redis/releases 这里下载Windows预编译版本的Redis,为了简便起见,我们选择解压包文件。安装测试文档,请参照 7.1 Redis 简介 。
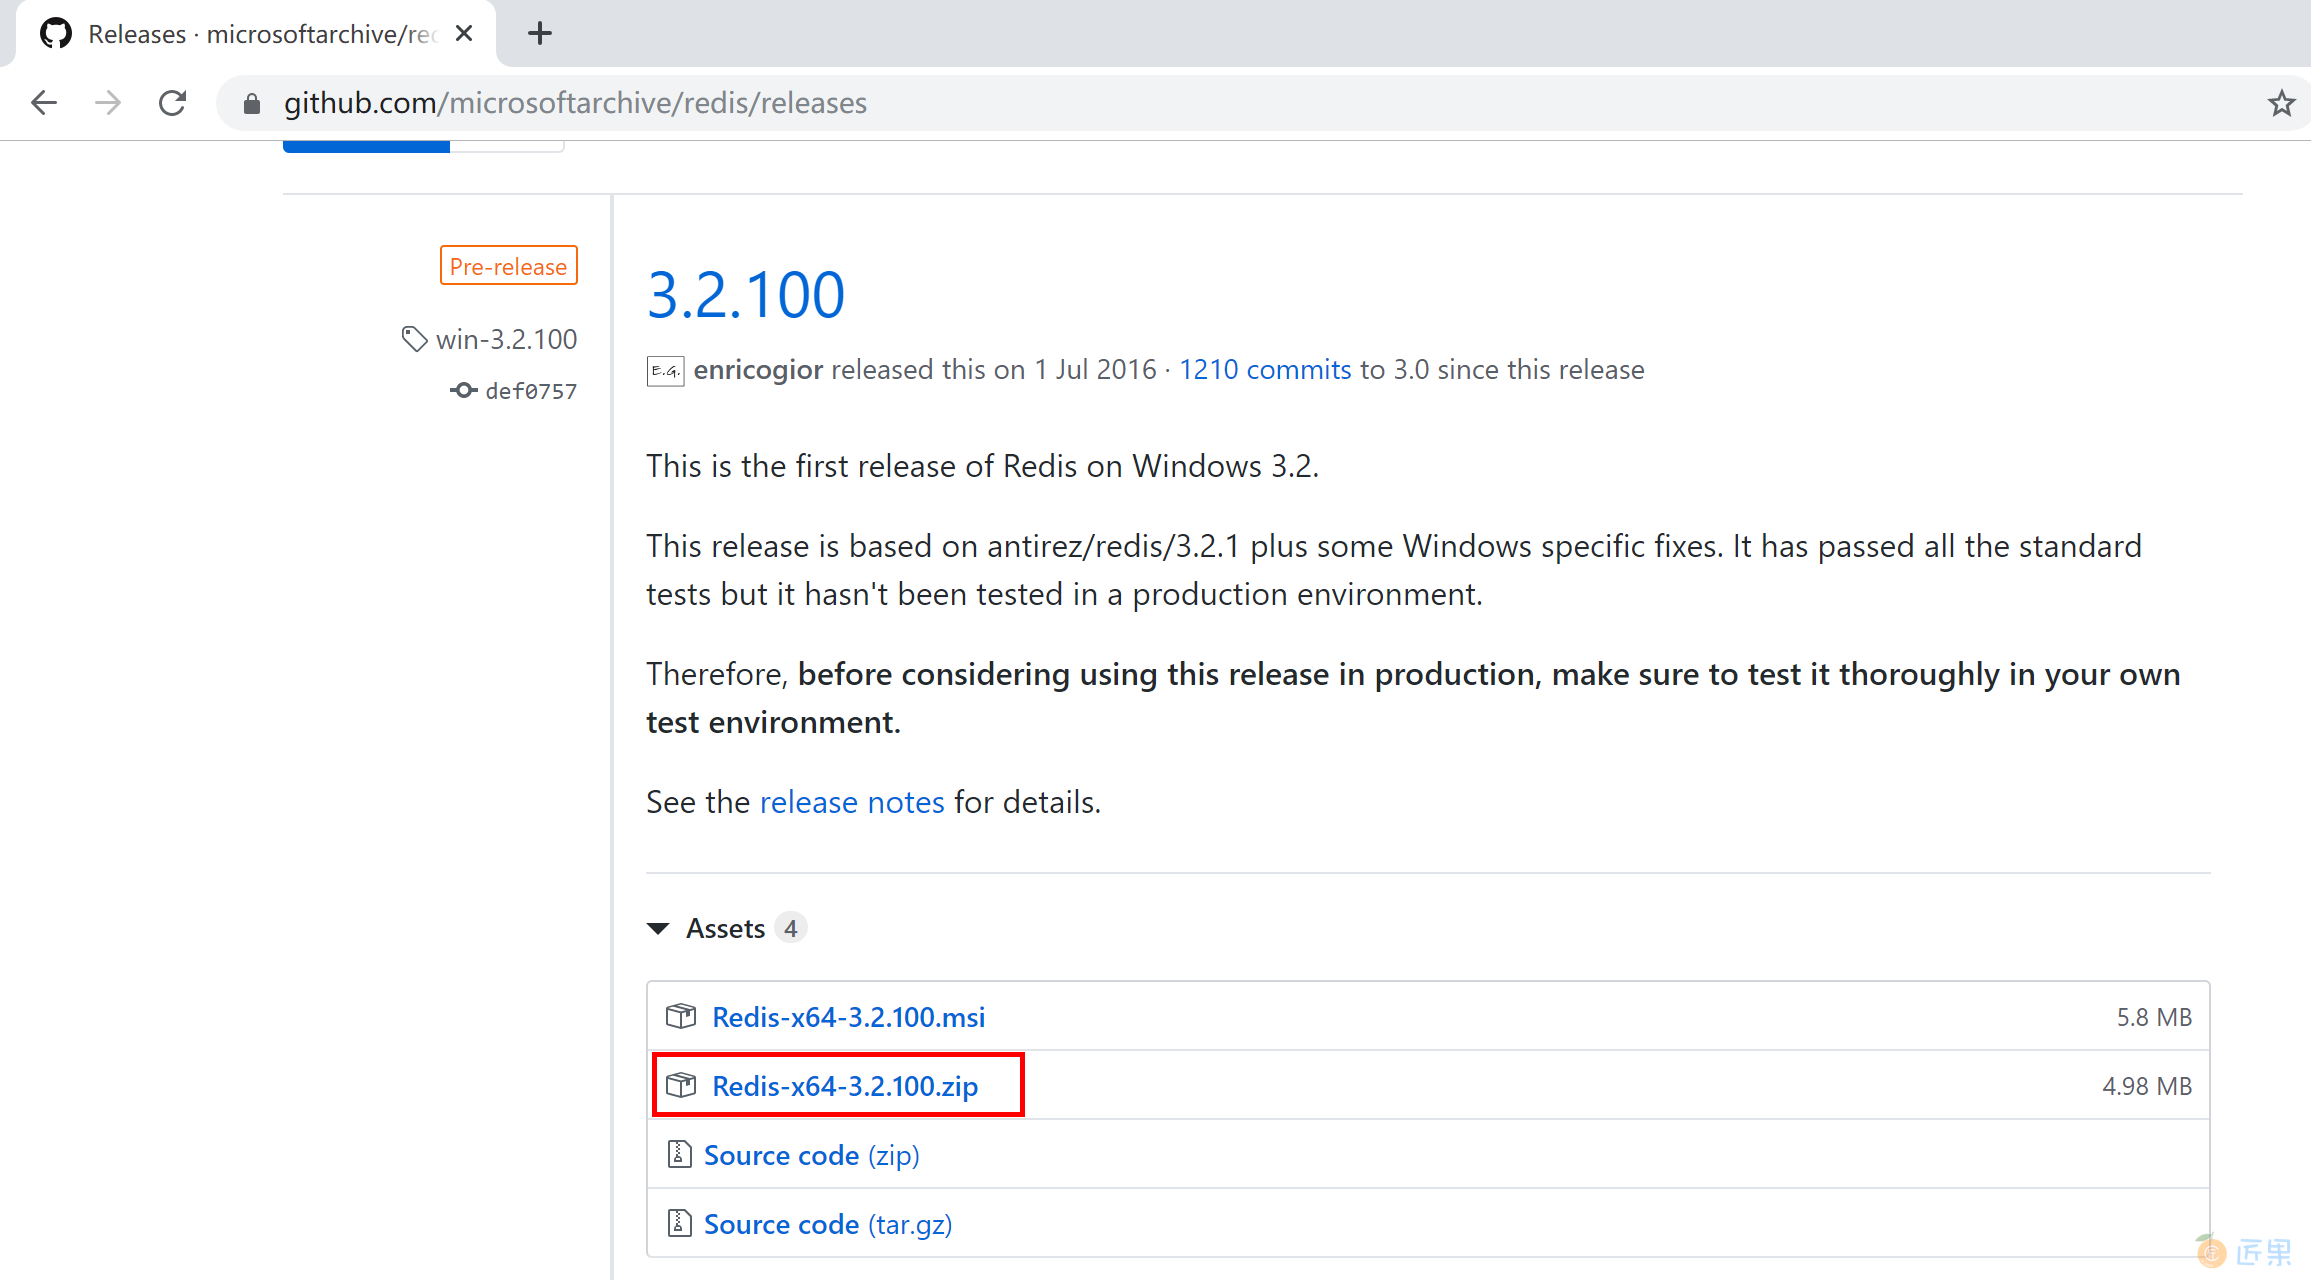
下载后,将其解压到用户目录中,例如C:\Users\Kevin\Redis-x64-3.2.100。双击redis-server.exe运行Redis服务器,可以看到Redis服务在6379端口上已经开放了。
1.3 安装 Consul
到官网下载 Windows 版本的 Consul,解压 consul.exe 到指定的文件夹下。创建 startup.bat 文件,以单节点方式启动,内容为:
consul.exe agent -dev -ui -client 0.0.0.0
打开浏览器,访问 http://localhost:8500/ 地址,查看 Consul 的管理控制台:

2. 新建项目
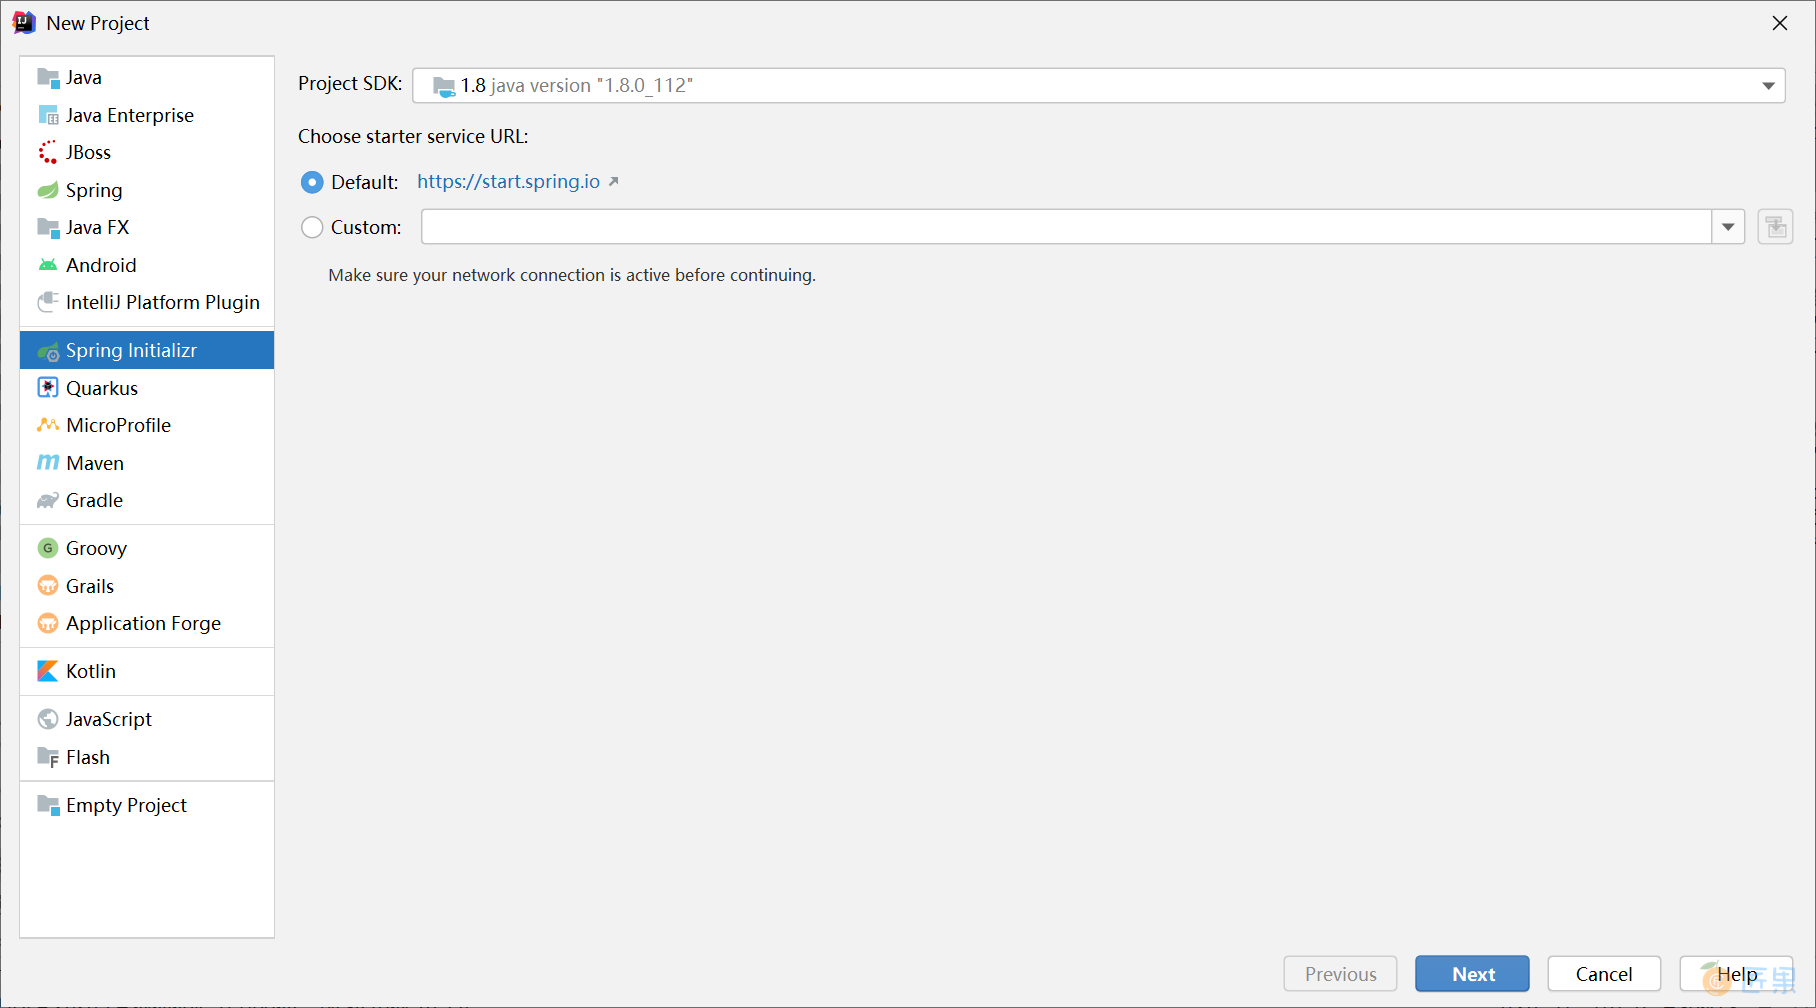
使用 Spring Initializr 创建一个新项目 demo,选择 Spring Boot 版本和 Spring Cloud 的任一组件。选择 Spring Initializr 向导:
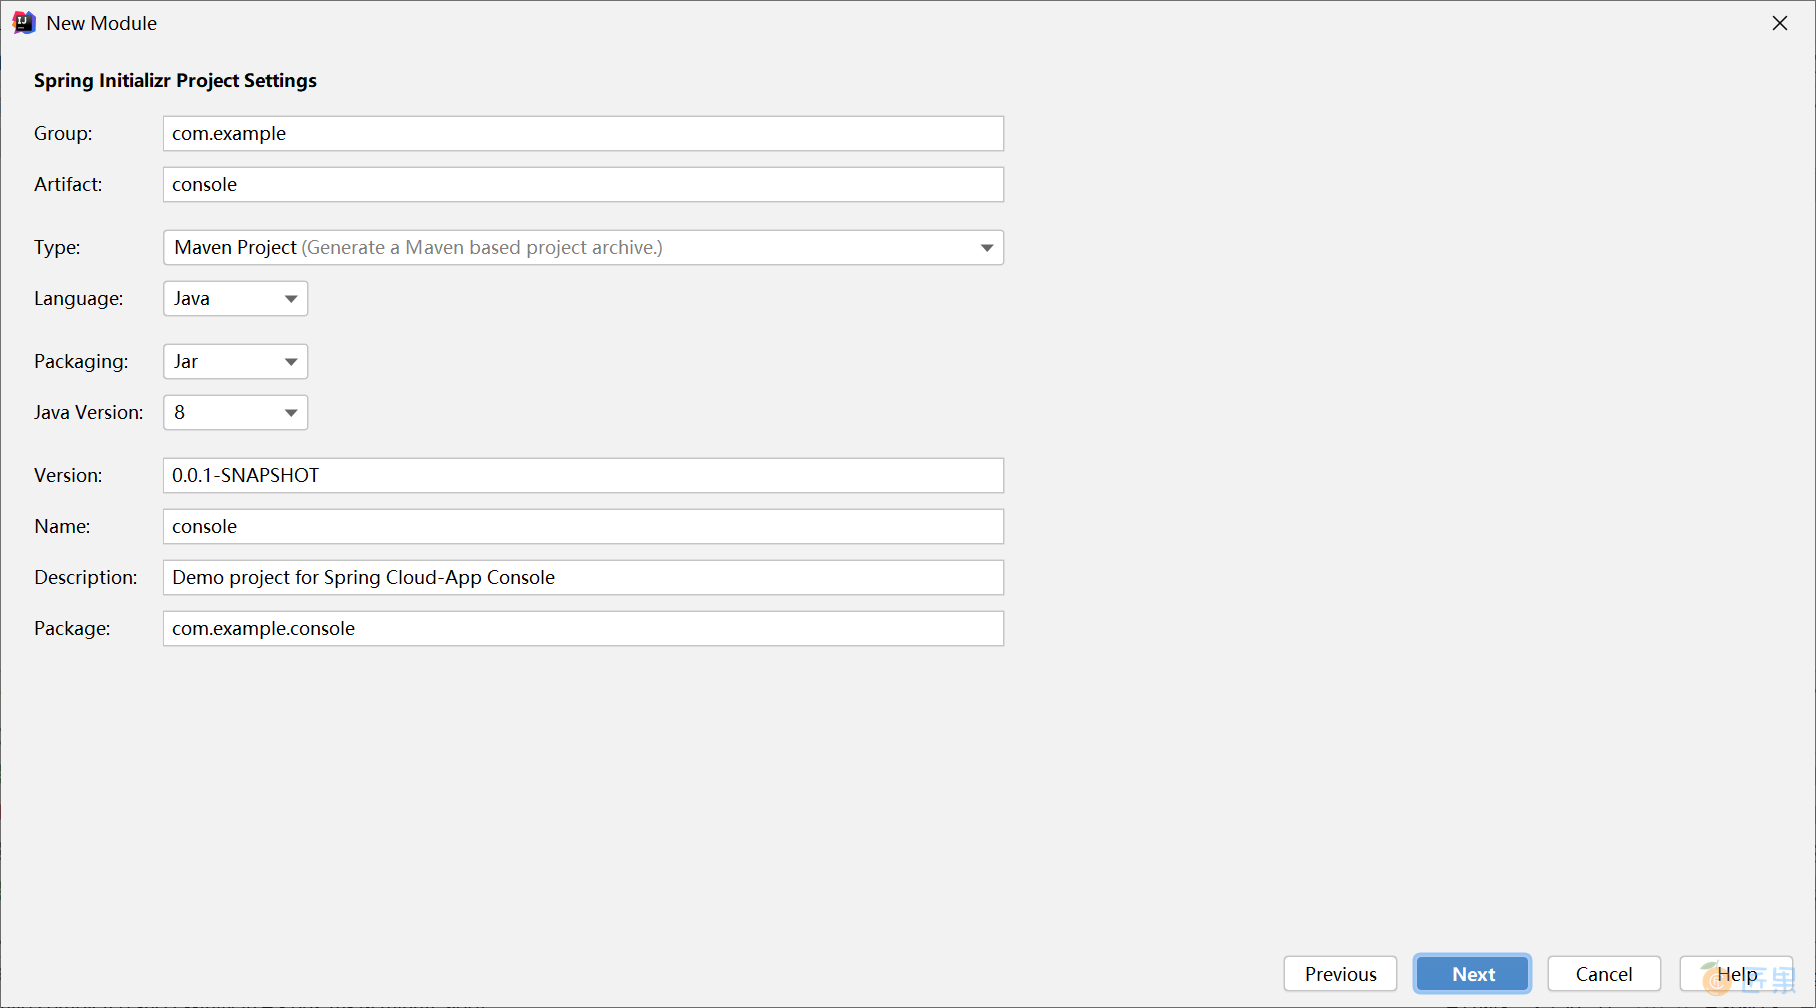
填写项目信息,需要注意的是 Maven 的 Artifact 信息:

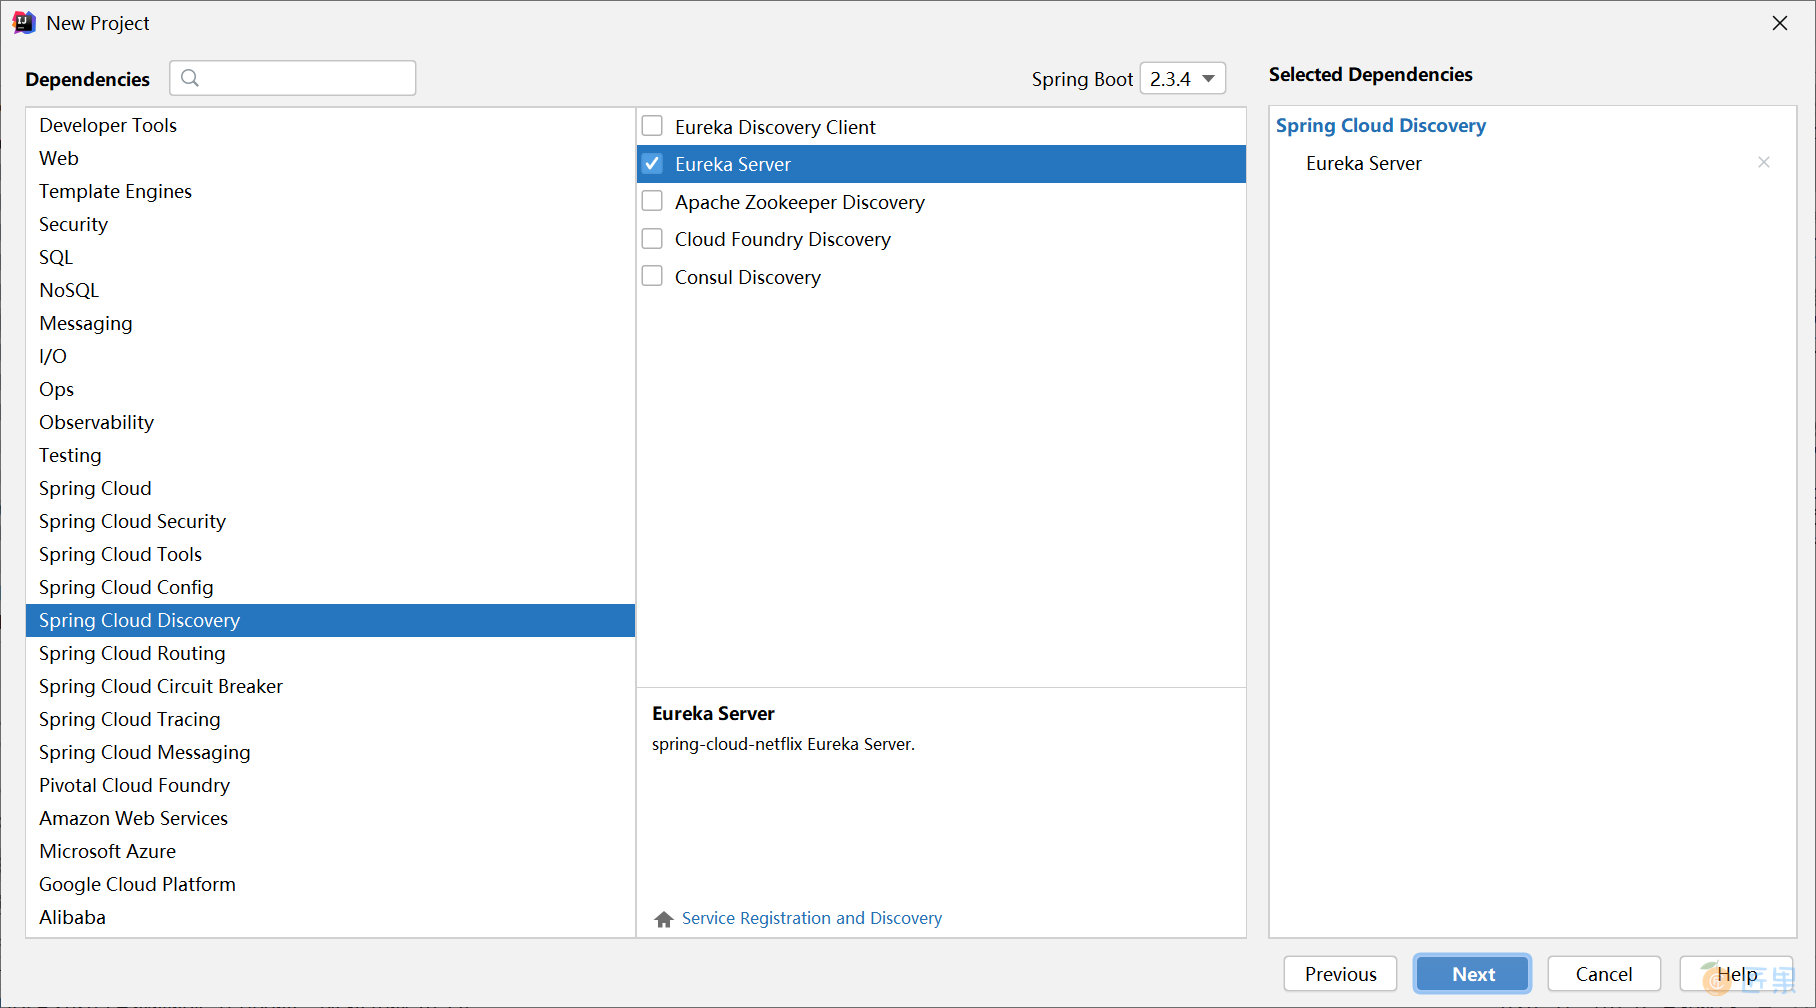
选择 Eureka Server 依赖:
确认 Maven 模块信息:

创建项目后,修改项目的 pom.xml 文件,其内容如下:
<?xml version="1.0" encoding="UTF-8"?>
<project xmlns="http://maven.apache.org/POM/4.0.0" xmlns:xsi="http://www.w3.org/2001/XMLSchema-instance"
         xsi:schemaLocation="http://maven.apache.org/POM/4.0.0 https://maven.apache.org/xsd/maven-4.0.0.xsd">
    <modelVersion>4.0.0</modelVersion>
    <parent>
        <groupId>org.springframework.boot</groupId>
        <artifactId>spring-boot-starter-parent</artifactId>
        <version>2.3.4.RELEASE</version>
        <relativePath/> <!-- lookup parent from repository -->
    </parent>
    <groupId>com.example</groupId>
    <artifactId>demo</artifactId>
    <version>0.0.1-SNAPSHOT</version>
    <name>demo</name>
    <packaging>pom</packaging>
    <description>Demo project for Spring Cloud</description>
    <properties>
        <java.version>1.8</java.version>
        <spring-cloud.version>Hoxton.SR8</spring-cloud.version>
    </properties>
    <dependencies>
        <dependency>
            <groupId>org.springframework.boot</groupId>
            <artifactId>spring-boot-starter-test</artifactId>
            <scope>test</scope>
            <exclusions>
                <exclusion>
                    <groupId>org.junit.vintage</groupId>
                    <artifactId>junit-vintage-engine</artifactId>
                </exclusion>
            </exclusions>
        </dependency>
    </dependencies>
    <dependencyManagement>
        <dependencies>
            <dependency>
                <groupId>org.springframework.cloud</groupId>
                <artifactId>spring-cloud-dependencies</artifactId>
                <version>${spring-cloud.version}</version>
                <type>pom</type>
                <scope>import</scope>
            </dependency>
        </dependencies>
    </dependencyManagement>
    <build>
        <plugins>
            <plugin>
                <groupId>org.springframework.boot</groupId>
                <artifactId>spring-boot-maven-plugin</artifactId>
            </plugin>
        </plugins>
    </build>
</project>
在项目的 pom.xml 文件中保留 test 和 plugin 配置,maven 项目打包类型修改为 pom 即可。然后删除掉项目的源码目录 src,项目结构如下:

本实验的后续微服务将以 maven module 的形式创建在 demo 项目下。
2.1 服务注册中心
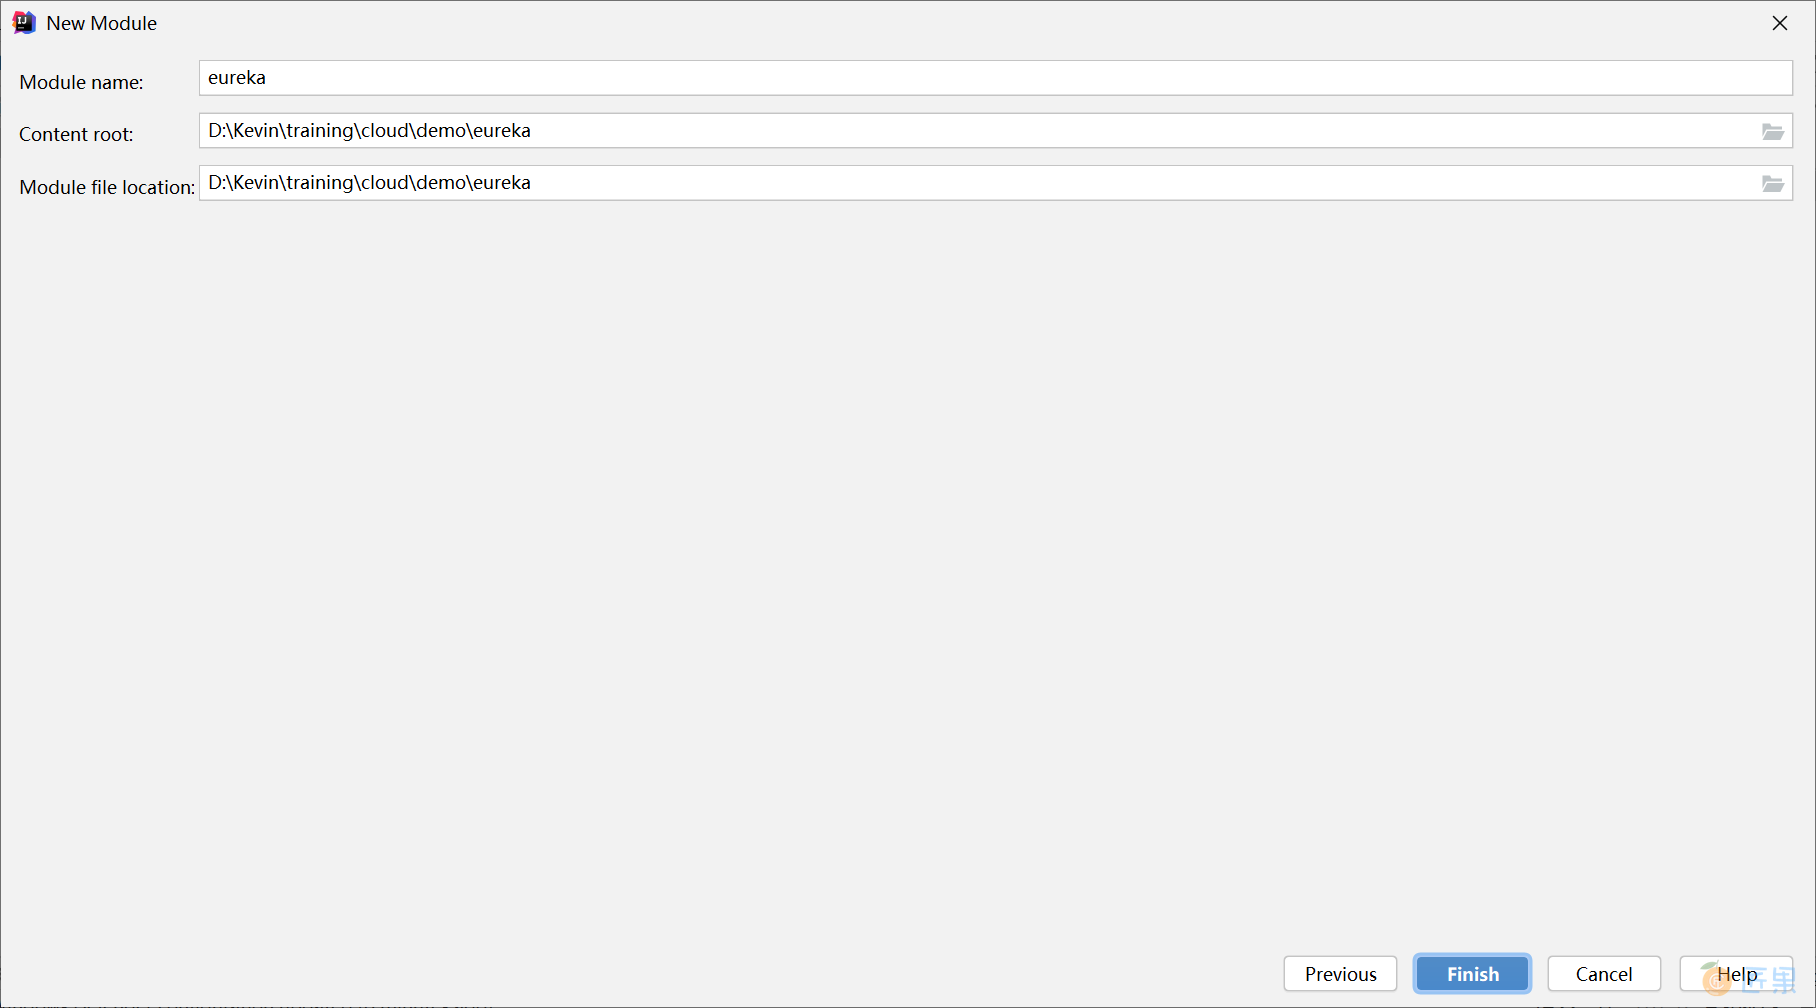
在 demo 项目中新建服务注册中心 eureka:

新建 module:

选择服务组件依赖:

确认项目文件保存位置:
在其 pom.xml 中依赖就是 eureka-server:
<dependency>
    <groupId>org.springframework.cloud</groupId>
    <artifactId>spring-cloud-starter-netflix-eureka-server</artifactId>
</dependency>
服务注册中心 Eureka 没有实际代码,主要信息在其配置文件 application.yml 中:
spring:
  application:
    name: eureka-server
server:
  port: 8761
eureka:
  instance:
    hostname: localhost
  client:
    register-with-eureka: false
    fetch-registry: false
    service-url:
      default-zone: http://${eureka.instance.hostname}:${server.port}/eureka/
启动类 EurekaApplication 中需要添加 @EnableEurekaServer 注解:
@SpringBootApplication
@EnableEurekaServer
public class EurekaApplication {
    public static void main(String[] args) {
        SpringApplication.run(EurekaApplication.class, args);
    }
}
2.2 配置中心
在 demo 项目中新建配置中心 config 服务:

选择依赖的组件:
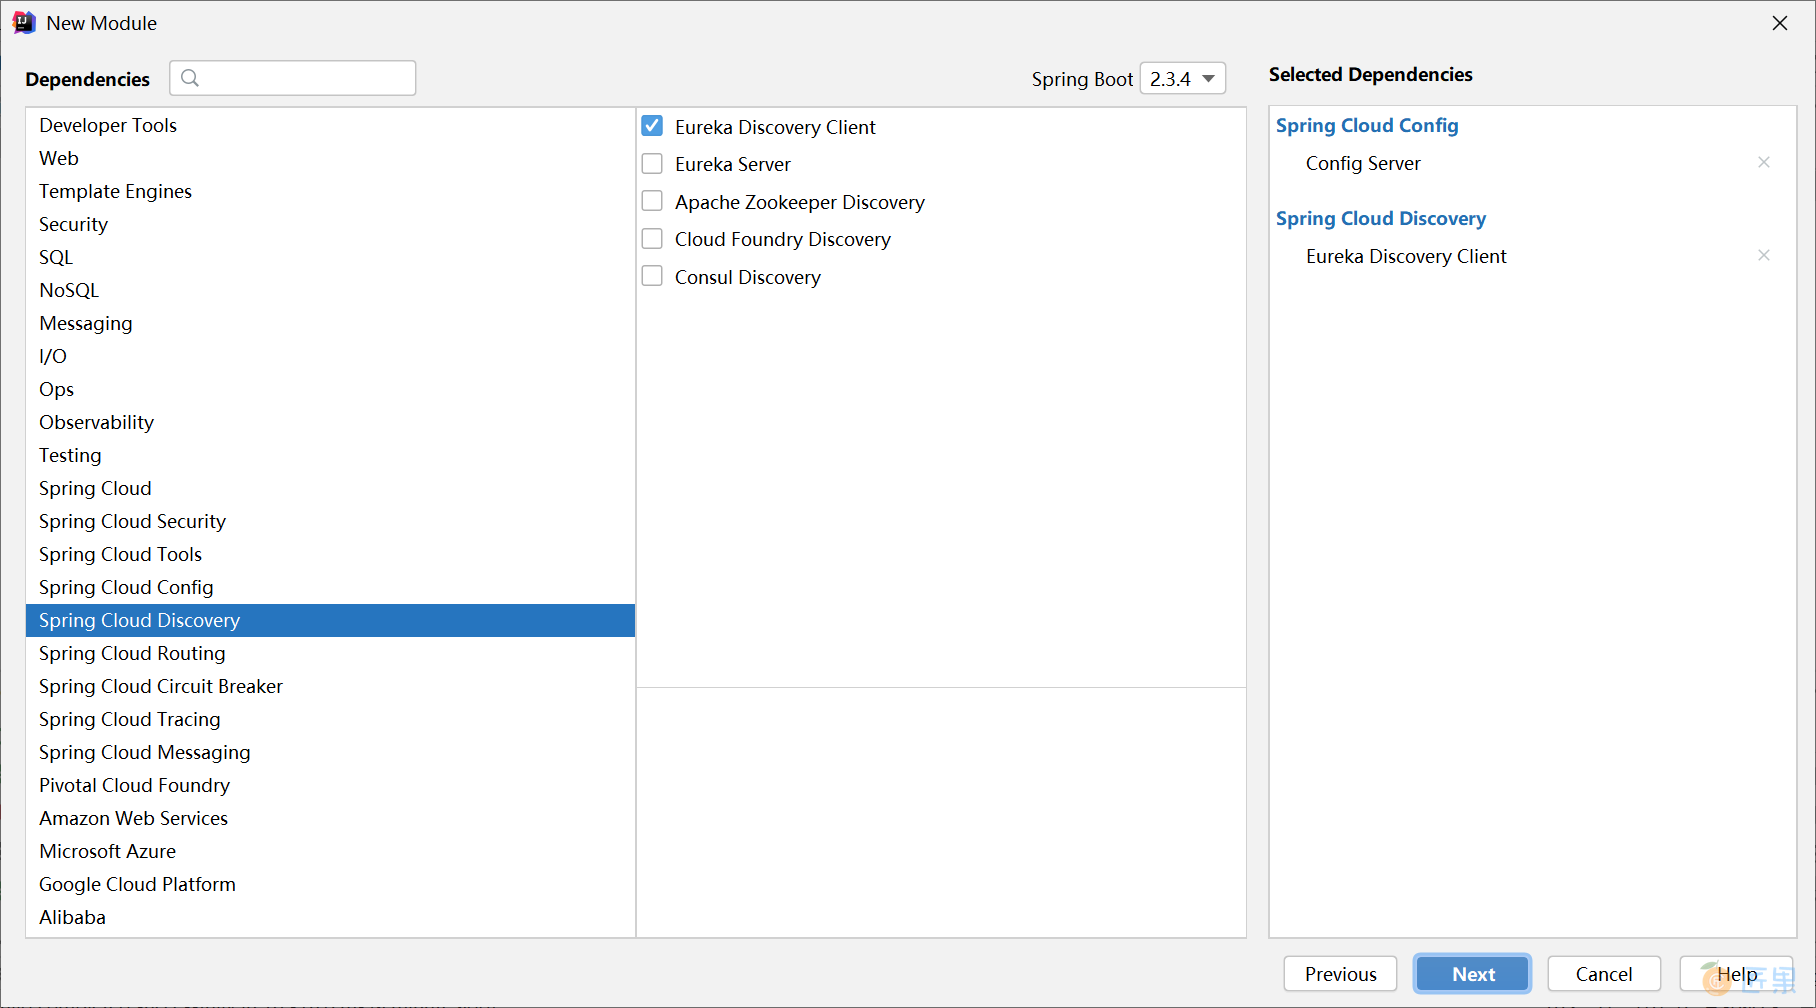
在其 pom.xml 中的依赖是:
<dependency>
    <groupId>org.springframework.cloud</groupId>
    <artifactId>spring-cloud-config-server</artifactId>
</dependency>
<dependency>
    <groupId>org.springframework.cloud</groupId>
    <artifactId>spring-cloud-starter-netflix-eureka-client</artifactId>
</dependency>
配置中心也几乎没有代码,主要是配置信息:
server:
  port: 9090
spring:
  application:
    name: service-config-server
  cloud:
    config:
      server:
        native:
          search-locations: classpath:/shared
  profiles:
    active: native
eureka:
  client:
    service-url:
      default-zone: http://localhost:8761/eureka/
在 classpath:/shared/service-member-dev.yml 文件中对后续的会员服务提供配置信息:
server:
  port: 7091
spring:
  application:
    name: service-member
eureka:
  client:
    service-url:
      default-zone: http://localhost:8761/eureka/
在启动类 ConfigApplication 中添加 @EnableConfigServer 注解:
@SpringBootApplication
@EnableConfigServer
public class ConfigApplication {
    public static void main(String[] args) {
        SpringApplication.run(ConfigApplication.class, args);
    }
}
2.3 会员服务
在 demo 项目中新建会员 member 服务:

选择依赖的组件:
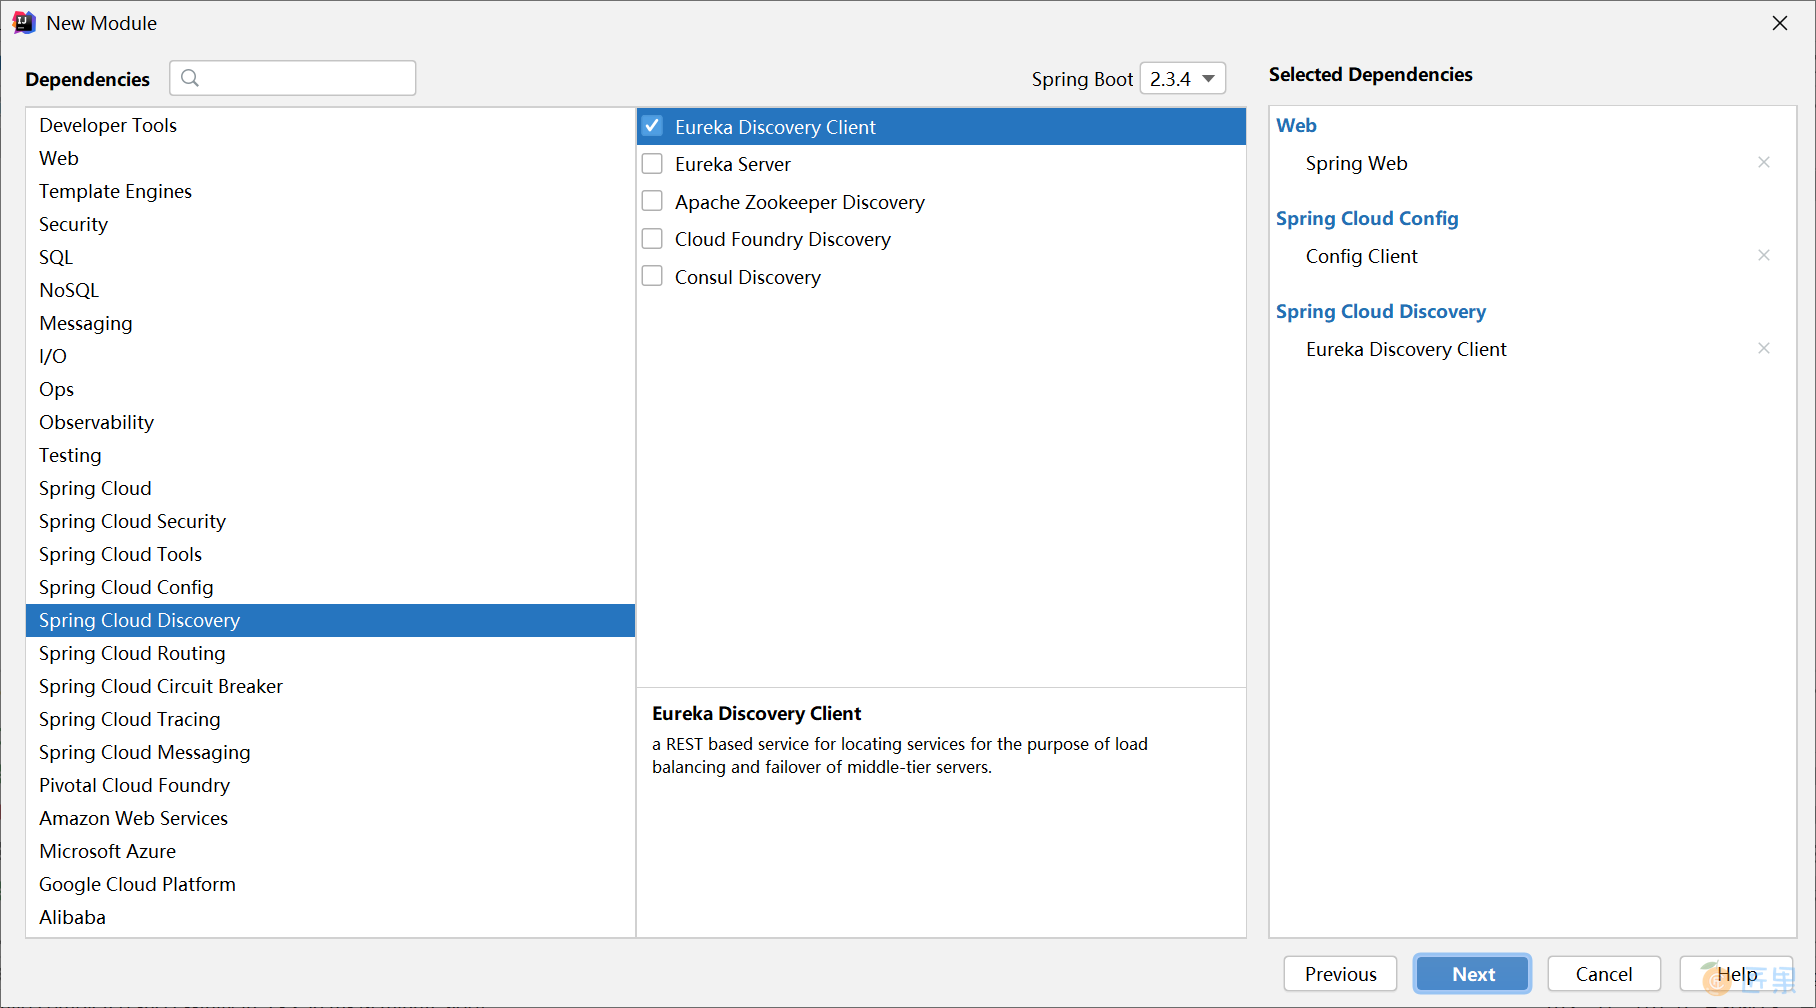
在其 pom.xml 中的依赖如下,注意其中的 spring-cloud-config-client 这个依赖是连接到配置中心的关键:
后续根据需要还要添加其他依赖。
<dependency>
    <groupId>org.springframework.boot</groupId>
    <artifactId>spring-boot-starter-web</artifactId>
</dependency>
<dependency>
    <groupId>org.springframework.cloud</groupId>
    <artifactId>spring-cloud-starter-netflix-eureka-client</artifactId>
</dependency>
<dependency>
    <groupId>org.springframework.cloud</groupId>
    <artifactId>spring-cloud-config-client</artifactId>
</dependency>
在其配置文件 bootstrap.yml 中添加到配置中心的配置信息:必须是 bootstrap.yml 文件,而不能是 application.yml。
spring:
  application:
    name: service-member
  cloud:
    config:
      discovery:
        enabled: true
        service-id: SERVICE-CONFIG-SERVER
      fail-fast: true
  profiles:
    active: dev
eureka:
  client:
    service-url:
      default-zone: http://localhost:8761/eureka/
添加 HelloController 控制器类,在其中添加 hello 方法,输出测试信息:
@RestController
public class HelloController {
    @RequestMapping("/hello")
    public String hello(String name){
        return "Hello " + name + ". From Member.";
    }
}
启动注册中心、配置中心和会员服务,访问地址http://localhost:7091/hello?name=Kevin, 测试会员服务是否可以正常加载配置中心的配置信息(请检查端口7091):

2.4 网关
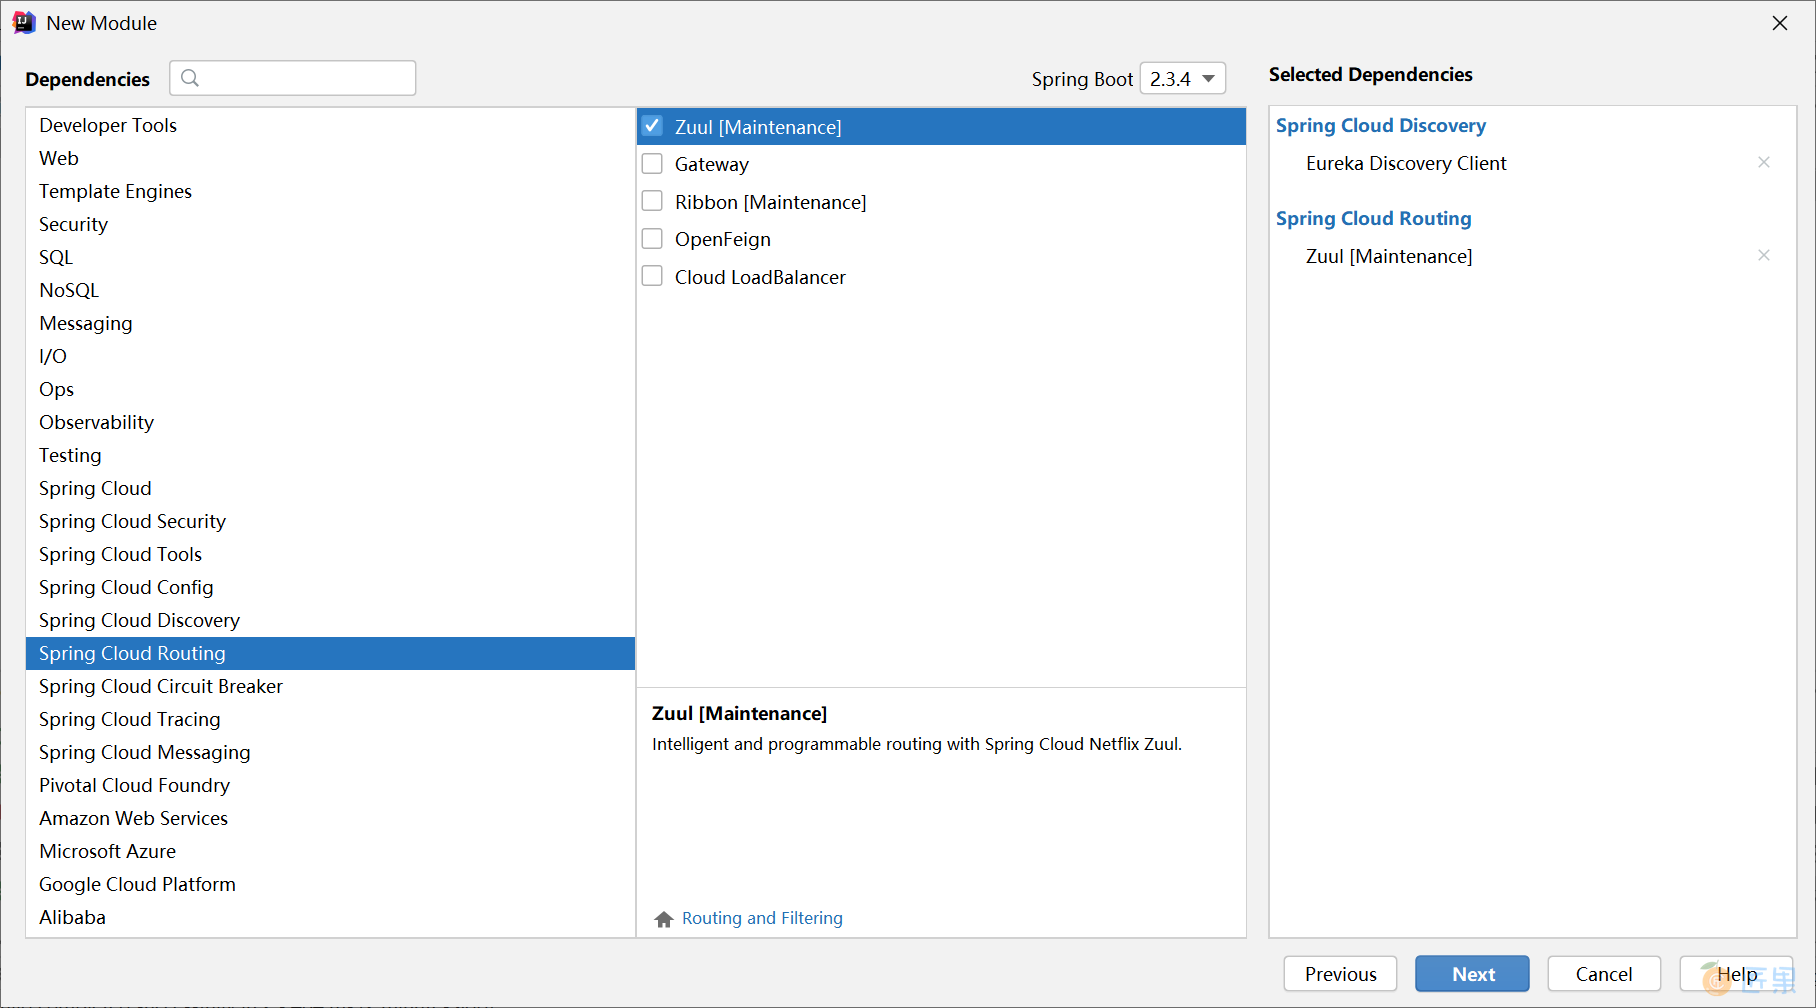
在 demo 项目中新建网关 zuul 服务:
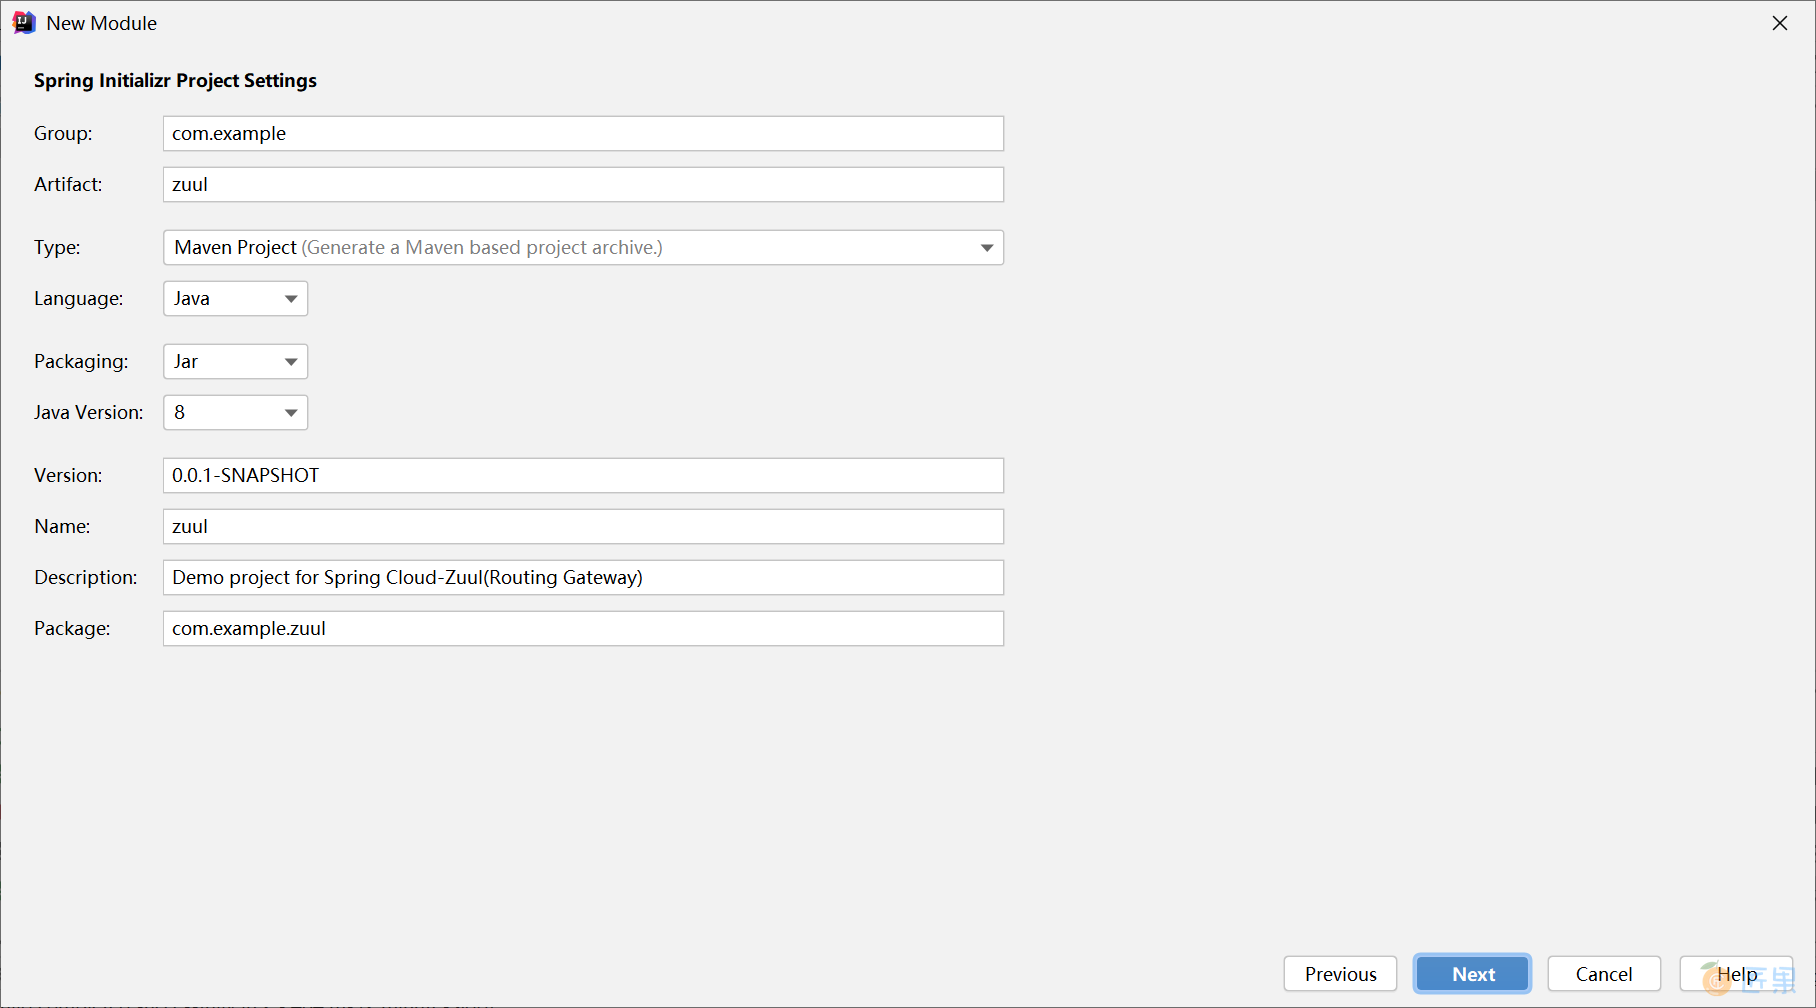
选择依赖的组件:
在其 pom.xml 中的依赖是:
<dependency>
    <groupId>org.springframework.cloud</groupId>
    <artifactId>spring-cloud-starter-netflix-eureka-client</artifactId>
</dependency>
<dependency>
    <groupId>org.springframework.cloud</groupId>
    <artifactId>spring-cloud-starter-netflix-zuul</artifactId>
</dependency>
网关服务中主要是配置信息和过滤器类,其配置信息如下:
server:
  port: 9000
spring:
  application:
    name: service-zuul
eureka:
  client:
    service-url:
      default-zone: http://localhost:8761/eureka/
zuul:
  routes:
    api:
      path: /api/member/**
      serviceId: SERVICE-MEMBER
  prefix: /v5.25
在其启动类中添加 @EnableZuulProxy 注解,开启网关服务:
@SpringBootApplication
@EnableEurekaClient
@EnableZuulProxy
public class ZuulApplication {
    public static void main(String[] args) {
        SpringApplication.run(ZuulApplication.class, args);
    }
}
为了演示网关过滤器的用法,新建 MyTokenFilter 类,覆盖 run 方法:本过滤器演示了一种权限的控制方法:请求中是否具有 token 变量。
@Component
public class MyTokenFilter extends ZuulFilter {
    Logger logger = LoggerFactory.getLogger(MyTokenFilter.class);
    @Override
    public String filterType() {
        return PRE_TYPE;
    }
    @Override
    public int filterOrder() {
        return 0;
    }
    @Override
    public boolean shouldFilter() {
        return true;
    }
    @Override
    public Object run() throws ZuulException {
        RequestContext context = RequestContext.getCurrentContext();
        HttpServletRequest request = context.getRequest();
        Object accessToken = request.getParameter("token");
        if (accessToken == null){
            logger.error("错误:没有访问令牌。");
            context.setSendZuulResponse(false);
            context.setResponseStatusCode(401);
            try {
                HttpServletResponse response = context.getResponse();
                response.setCharacterEncoding("GBK");
                response.getWriter().write("错误:没有访问令牌。");
            } catch (IOException e) {
                e.printStackTrace();
            }
        }
        return null;
    }
}
在启动服务注册中心、配置中心和会员服务的情况下,启动网关访问地址 http://localhost:9000/v5.25/api/member/hello?name=Kevin&token=Zhang, 测试网关(端口9000)是否可以正常返回会员服务的测试接口:

访问不带token的地址 http://localhost:9000/v5.25/api/member/hello?name=Kevin, 测试网关中的过滤器是否正常工作:

2.5 应用控制台
在 demo 项目中新建应用控制台 console 服务:
选择依赖的组件:
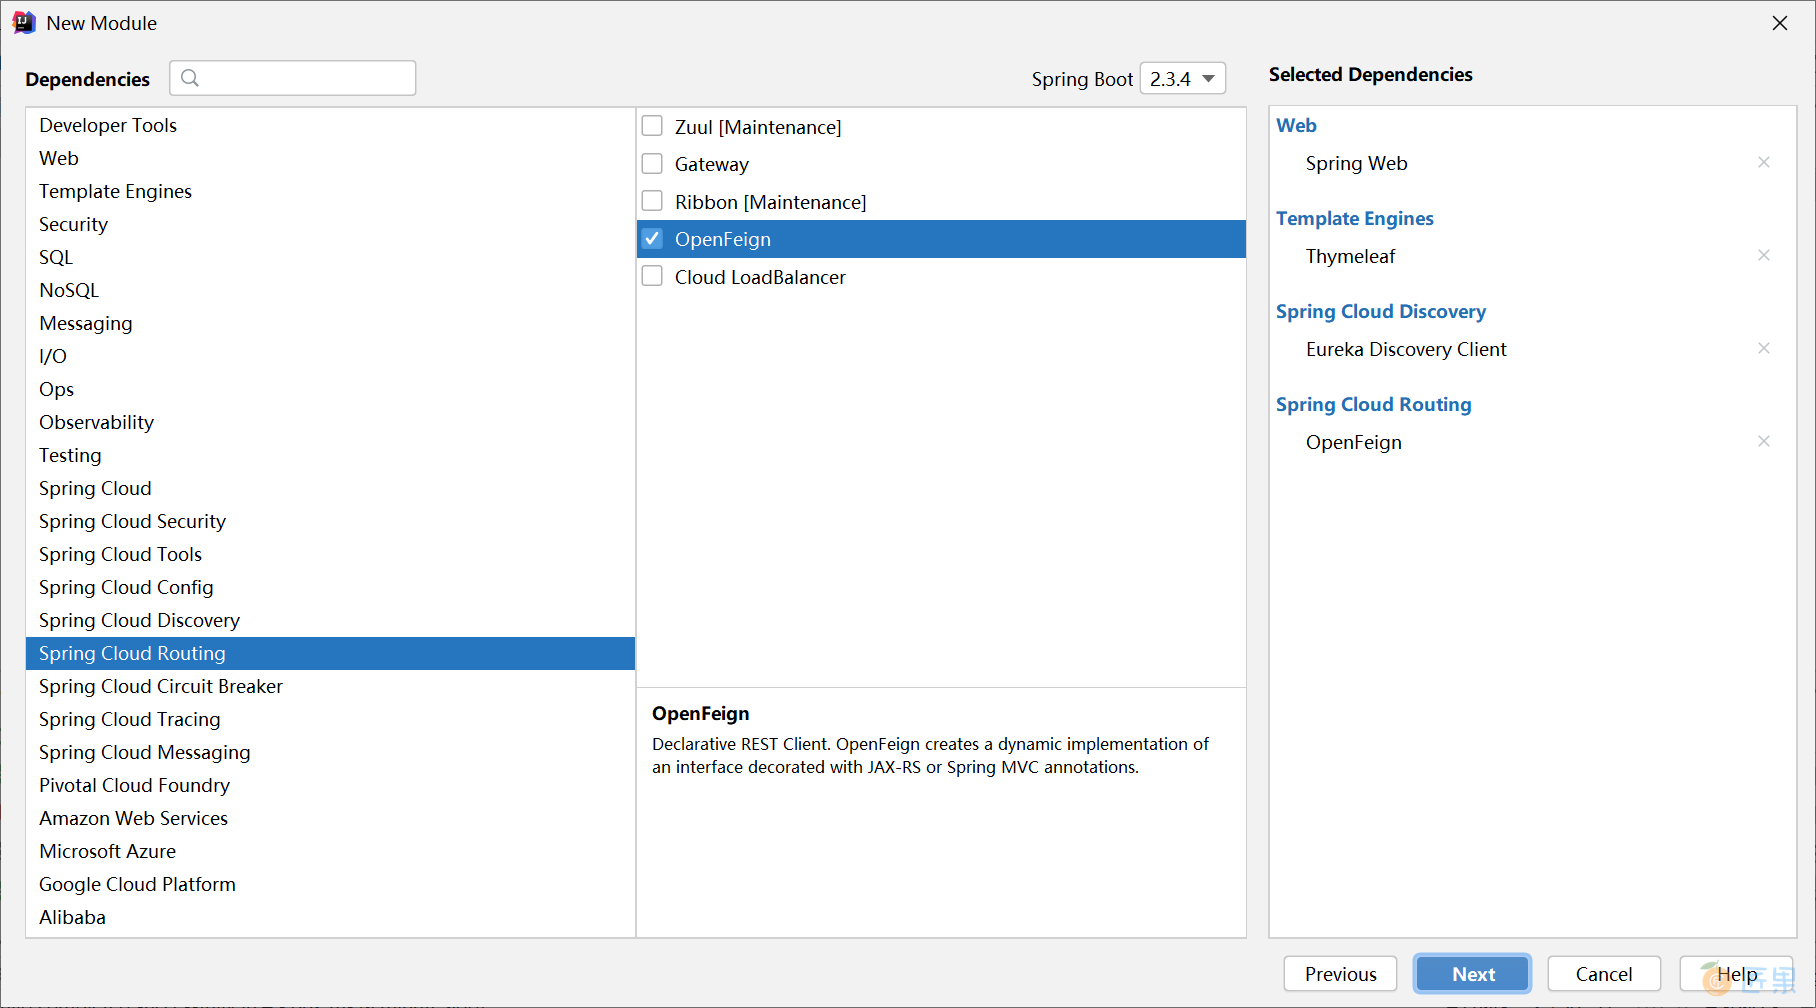
在其 pom.xml 中的依赖是:
<dependency>
    <groupId>org.springframework.boot</groupId>
    <artifactId>spring-boot-starter-thymeleaf</artifactId>
</dependency>
<dependency>
    <groupId>org.springframework.boot</groupId>
    <artifactId>spring-boot-starter-web</artifactId>
</dependency>
<dependency>
    <groupId>org.springframework.cloud</groupId>
    <artifactId>spring-cloud-starter-netflix-eureka-client</artifactId>
</dependency>
<dependency>
    <groupId>org.springframework.cloud</groupId>
    <artifactId>spring-cloud-starter-openfeign</artifactId>
</dependency>
console 服务的配置是一个典型的 Spring Boot Web 项目,但是打开了 hystrix 的熔断处理:
server:
  port: 8080
spring:
  application:
    name: service-console
eureka:
  client:
    service-url:
      default-zone: http://localhost:8761/eureka/
feign:
  hystrix:
    enabled: true
在其启动类 ConsoleApplication 中,添加了 @EnableFeignClients 注解,打开 Feign 调用:
@SpringBootApplication
@EnableEurekaClient
@EnableFeignClients
public class ConsoleApplication {
    public static void main(String[] args) {
        SpringApplication.run(ConsoleApplication.class, args);
    }
}
新建 Feign 调用 HelloClientFeign 接口,其中的 SERVICE-ZUUL 是网关的服务,fallback 是熔断器断开时的快速返回调用。hello 方法实质是调用了 zuul 网关之后 member 服务的 hello 方法:
@FeignClient(value = "SERVICE-ZUUL", fallback = HelloClientHystrix.class)
public interface HelloClientFeign {
    @GetMapping(value = "/v5.25/api/member/hello")
    String hello(@RequestParam(value = "name") String name, @RequestParam(value = "token") String token);
}
创建一个 HelloClientHystrix 类,实现 HelloClientFeign 接口,为调用失败时返回对应的错误提示信息:
@Component
public class HelloClientHystrix implements HelloClientFeign {
    @Override
    public String hello(String name, String token) {
        return "OOPS..." + name + ", SOMETHING IS WRONG!";
    }
}
新建一个服务类 HelloService,将 Feign 调用(远程)的接口 HelloClientFeign 注入:
@Service
public class HelloService {
    @Autowired
    private HelloClientFeign helloClientFeign;
    public String hello(String name, String token){

        return helloClientFeign.hello(name, token);
    }
}
新建一个控制器 HelloController 类,注入 HelloService 服务类,为显示页面提供远程服务方法调用:
@Controller
public class HelloController {
    @Autowired
    HelloService helloService;
    @RequestMapping("/hello")
    public ModelAndView hello(String name, String token) {
        ModelAndView mv = new ModelAndView();
        String sayHello = helloService.hello(name, token);
        mv.addObject("sayHello", sayHello);
        mv.addObject("accessToken", token);
        mv.setViewName("/hello");
        return mv;
    }
}
创建 hello.index 页面,显示 ModelAndView 中携带的数据:
<!DOCTYPE html>
<html lang="en" xmlns:th="http://www.thymeleaf.org">
<head>
    <meta charset="UTF-8">
    <title>你好,世界。</title>
</head>
<body>
    <div class="login">
        <h3>测试,测试:</h3>
        <p th:text="${sayHello}"/>
        <p th:text="${accessToken}"/>
    </div>
</body>
</html>
在正确启动网关的情况下,访问地址 http://localhost:8080/hello?name=Roy&token=Zhang, 测试应用控制台是否可以正常使用 Feign 访问网关的服务:

3. 扩展项目
在本小节里面,我们将基础的 Spring Cloud 项目扩展为一个最简单电商场景的应用,有如下特性或限制:
- 使用 MySQL 数据库存储数据;
- 使用 MyBatis 作为数据持久化框架;
- 使用 MyBatisPlus 作为数据访问基础框架;
- 从技术上集成 Redis 缓存,增减商品个数时同时往数据库和缓存中增减;
- 从技术上集成 RabbitMQ 消息中间件,购买商品时通过消息通知仓库发货(日志输出信息表示发货);
- 为了集中学习焦点,选择的场景非常简单,并且和实际生活中的场景出入较大;
- 包含两个微服务:会员和商品。订单服务请自行添加;
- 在集成 RabbitMQ 的示例中直接在商品服务中添加了发货消息,从职责上划分并不合适。
3.1 集成 Redis
在会员(member)服务中添加 Redis 服务,以集成测试缓存 Redis。
限制:本实验中使用 Windows 版本的单机 Redis 进行演示。使用 Redis 集群,请参考 7.4 Redis 集群 。
在 pom.xml 文件中添加 Redis 依赖:
<dependency>
    <groupId>org.springframework.boot</groupId>
    <artifactId>spring-boot-starter-data-redis</artifactId>
</dependency>
在配置文件 bootstrap.yml 中添加连接到 Redis 的配置信息:
spring:
  redis:
    database: 0
    host: localhost
    port: 6379
    password:
添加 HelloService 类,使用org.springframework.data.redis.core.StringRedisTemplate模板操作 Redis:
@Service
public class HelloService {
    @Resource
    private StringRedisTemplate strTemplate;
    private Logger logger = LoggerFactory.getLogger(HelloService.class);
    public void testRedis(String name){
        strTemplate.opsForValue().set("name", name);
        String nameInRedis = strTemplate.opsForValue().get("name");
        logger.info("Name in Redis=" + nameInRedis);
    }
}
在 HelloController 类中调用 HelloService 的 testRedis 方法,测试 Redis 是否可以正确使用:
@RestController
public class HelloController {
    @Autowired
    private HelloService helloService;
    @RequestMapping("/hello")
    public String hello(String name){
        helloService.testRedis(name);
        return "Hello " + name + ". From Member.";
    }
}
在 idea 的控制台中查看 HelloService.testRedis 方法输出的日志:
2020-10-30 06:32:19.266  INFO 7152 --- [nio-7091-exec-3] com.example.member.service.HelloService  : Name in Redis=Roy
2020-10-30 06:33:51.009  INFO 7152 --- [nio-7091-exec-5] com.example.member.service.HelloService  : Name in Redis=Kevin
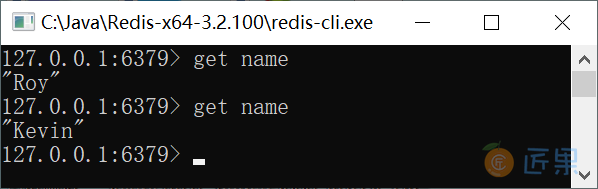
打开 Redis 的命令控制台(redis-cli.exe)输入命令get name,查看 Redis 中存放的键值对是否正确。
3.2 集成 RabbitMQ
在会员(member)服务中添加 RabbitMQ 服务,以集成测试消息中间件 RabbitMQ。在 pom.xml 文件中添加 RabbitMQ 依赖:
<dependency>
    <groupId>org.springframework.boot</groupId>
    <artifactId>spring-boot-starter-amqp</artifactId>
</dependency>
在配置文件 bootstrap.yml 中添加连接到 RabbitMQ 的配置信息:
spring:
  rabbitmq:
    host: 127.0.0.1
    port: 5672
    username: guest
    password: guest
    # 开启发送确认
    publisher-confirm-type: correlated
    # 开启发送失败退回
    publisher-returns: true
    # 开启ACK
    listener:
      direct:
        acknowledge-mode: manual
      simple:
        acknowledge-mode: manual
添加 RabbitMQConfig 配置类,创建一个消息队列:
@Configuration
public class RabbitMQConfig {
    @Bean
    public Queue kevinQueue() {
        return new Queue("kevin");
    }
}
在 HelloService 类中添加 testRabbitMQ 方法,发送消息:
public void testRabbitMQ(String name){
    String message = name + " is a GOODMAN.";
    amqpTemplate.convertAndSend("kevin", message);
    logger.info("Send Message: " + message);
}
创建消息消费者 RabbitMQConsumer 类,监听kevin消息队列的消息,并在管理控制台上输出接收到的消息:
@Component
@RabbitListener(queues = "kevin")
public class RabbitMQConsumer {
    private Logger logger = LoggerFactory.getLogger(RabbitMQConsumer.class);
    @RabbitHandler
    public void receive(String msg) {
        logger.info("RabbitMQ Consumer consume message: " + msg);
    }
}
在 idea 的控制台中查看 HelloService 发送的消息和 RabbitMQConsumer 接受到的消息:
2020-10-30 07:17:11.328  INFO 6160 --- [nio-7091-exec-2] com.example.member.service.HelloService  : Send Message: Kevin is a GOODMAN.
2020-10-30 07:17:11.331  INFO 6160 --- [ntContainer#0-1] c.e.member.service.RabbitMQConsumer      : RabbitMQ Consumer consume message: Kevin is a GOODMAN.
在 RabbitMQ 的 Web 控制台中检查消息队列情况:

3.3 将项目进行扩展
作业:请将 Spring Boot 练习环节完成的单体电商购物代码,移植到 Spring Cloud 微服务架构。注意:
- 需要创建商品服务(product),订单服务(order);
- 所有和界面相关的内容,全部写在 console 服务中;
- 会员服务(member),商品服务(product),订单服务(order)中不能出现 Thymeleaf 页面;
- (可选)使用前后端分离技术(例如 vue)代替 console 服务。
4. 背景知识
- application.yml 和 bootstrap.yml 在同一目录下:bootstrap.yml 先加载 application.yml 后加载。
- bootstrap.yml 和 application.yml 都可以用来配置参数。
- bootstrap.yml 用来程序引导时执行,应用于更加早期配置信息读取。可以理解成系统级别的一些参数配置,这些参数一般是不会变动的。一旦bootStrap.yml 被加载,则内容不会被覆盖。
- application.yml 可以用来定义应用级别的, 应用程序特有配置信息,可以用来配置后续各个模块中需使用的公共参数等。
bootstrap.yml典型的应用场景
- 当使用 Spring Cloud Config Server 配置中心时,这时需要在 bootstrap.yml 配置文件中指定;spring.application.name 和 spring.cloud.config.server.git.uri,添加连接到配置中心的配置属性来加载外部配置中心的配置信息;
- 一些固定的不能被覆盖的属性;
- 一些加密/解密的场景。