一、项目说明
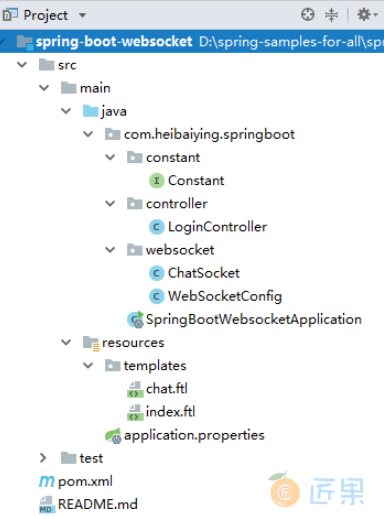
1.1 项目结构
- 项目模拟一个简单的群聊功能,为区分不同的聊天客户端,登录时候将临时用户名存储在 session 当中;
- 关于 WebSocket 的主要配置在 WebSocket 文件夹下;
- 模板引擎采用 freemaker;
- 项目以 Web 的方式构建。
1.2 基本依赖
<dependency>
    <groupId>org.springframework.boot</groupId>
    <artifactId>spring-boot-starter-web</artifactId>
</dependency>
<!--spring boot webSocket 的依赖包 -->
<dependency>
    <groupId>org.springframework.boot</groupId>
    <artifactId>spring-boot-starter-websocket</artifactId>
</dependency>
<dependency>
    <groupId>org.springframework.boot</groupId>
    <artifactId>spring-boot-starter-freemarker</artifactId>
</dependency>
二、Spring Boot WebSocket
2.1 消息处理
创建消息处理类 ChatSocket,使用 @ServerEndpoint 声明 WebSocket 服务:
@ServerEndpoint(value = "/socket/{username}")
@Component
public class ChatSocket {
    /**
     * 建立连接时候触发
     */
    @OnOpen
    public void onOpen(Session session, @PathParam("username") String username) {
        // 这个方法是线程不安全的
        Constant.nameAndSession.putIfAbsent(username, session);
    }
    /**
     * 关闭连接时候触发
     */
    @OnClose
    public void onClose(Session session, @PathParam("username") String username) {
        Constant.nameAndSession.remove(username);
    }
    /**
     * 处理消息
     */
    @OnMessage
    public void onMessage(Session session, String message, @PathParam("username") String username) throws UnsupportedEncodingException {
        // 防止中文乱码
        String msg = URLDecoder.decode(message, "utf-8");
        // 简单模拟群发消息
        Constant.nameAndSession.forEach((s, webSocketSession)
                -> {
            try {
                webSocketSession.getBasicRemote().sendText(username + " : " + msg);
            } catch (IOException e) {
                e.printStackTrace();
            }
        });
    }
}
2.2 注册服务
配置 ServerEndpointExporter,ServerEndpointExporter 会在运行时候自动注册我们用 @ServerEndpoint 注解声明的 WebSocket 服务:
@Configuration
public class WebSocketConfig {
    /***
     * 检测{@link javax.websocket.server.ServerEndpointConfig}和{@link ServerEndpoint} 类型的 bean,
     * 并在运行时使用标准 Java WebSocket 时注册。
     * 我们在{@link com.heibaiying.springboot.websocket.WebSocketConfig}中就是使用@ServerEndpoint 去声明 websocket 服务
     */
    @Bean
    public ServerEndpointExporter serverEndpointExporter() {
        return new ServerEndpointExporter();
    }
}
2.3 前端 WebSocket
<!doctype html>
<html lang="en">
<head>
    <title>${Session["username"]}您好!欢迎进入群聊大厅!</title>
</head>
<body>
    <h5>${Session["username"]}您好!欢迎进入群聊大厅!</h5>
    <input id="message" type="text">
    <button id="btn">发送消息</button>
    <div id="show">
    </div>
<script>
    let btn = document.getElementById("btn");
    let message = document.getElementById("message");
    let show = document.getElementById("show");
    let ws = new WebSocket("ws://localhost:8080/socket/${Session["username"]}");
    ws.onmessage = function (evt) {
        let node = document.createElement("div");
        node.innerHTML = "<h5>" + evt.data + "</h5>";
        show.appendChild(node);
    };
    btn.addEventListener("click", function () {
        let data = message.value;
        console.log(data);
        if (data) {
            ws.send(encodeURI(data));
        } else {
            alert("请输入消息后发送");
        }
        message.value = "";
    });
    // 关闭页面时候关闭 ws
    window.addEventListener("beforeunload", function (event) {
        ws.close();
    });
</script>
</body>
</html>
2.4 简单登录的实现
<!doctype html>
<html lang="en">
<head>
    <title>Title</title>
</head>
<body>
<form action="/login" method="post">
    <input name="username" type="text">
    <button id="btn">输入临时用户名后登录!</button>
</form>
</body>
</html>
/**
 * @description : 简单登录
 */
@Controller
public class LoginController {
    @PostMapping("login")
    public String login(String username, HttpSession session) {
        session.setAttribute(Constant.USER_NAME, username);
        return "chat";
    }
    @GetMapping
    public String index() {
        return "index";
    }
}